Wedding Budget Realities: DIY Invitation Tips
I'll be the first to tell you that Pinterest and Instagram are wonderful and evil when you are planning a wedding. I've even had some conversations with former brides-to-be who say they are glad all this wedding photo inspiration wasn't around when they were planning their big days.
On the one hand, it is wonderful to have what seems like an endless repository of ideas, tutorials, and suggestions. On the other hand, the plethora of inspiration can be overwhelming and start putting visions in your head that are WAY outside of your budget. It's a bit like the HGTV effect. No, you cannot renovate your kitchen for what the Property Brothers say it costs -- at least not without a lot of your own sweat equity. Same goes for weddings. No, you cannot have beautiful letterpress invitations with every bell and whistle and then have them addressed by a professional calligrapher for a bargain. Atleast not a bargain that was within in my budget. Heartbreaking, I know. But, you can put together a great invitation even if you are on a tighter budget.
I did quite a bit of reading up on DIY invites before embarking on creating my own vision. A couple of key things I took away from my research were:
DIY can get expensive, too. It is important to price out materials and printing costs to make sure you really are saving money. When I say materials, that means more than just paper and envelopes. That means other tools like a cutting board, adhesive tools and other craft supplies.
DIY takes time. Part of what you are pay for when you work with a business that deals in wedding invitations is their time and energy put into making your invites flawless! They also have a lot of tools and expertise to streamline the process. Be sure you have the time and are willing to invest in this project or you might find yourself unhappy with the results.
Consider your abilities. Do you enjoy DIY projects? Do you think of yourself as crafty? If your answer is "no" to these questions, perhaps the DIY route is not for you. Now, if you just want a simple invite sweet printed, that is completely doable with no crafting skills required. If you want some bells and whistles as part of the package, I would look into having a friend or family member who likes that kind of thing help or consider hiring out the invites. The wedding planning process should be fun, so don't stress yourself out trying to do something you don't like and/or are not good at.
Here is a rundown of how I went about crafting our invitations!
Materials
Paper, Envelopes, Envelope Liners
After doing some asking and Internet searching, I learned that Anchor Paper in the Twin Cities is a go-to spot for warehouse pricing on paper, envelopes, and other paper goods you might need. I was able to purchase 100 lb (lb.) kraft cardstock here at about $8 for 25 sheet packs. You can find cheaper cardstock, but everything I've read suggested using paper at least 80lb weight or heavier for invitations. I agree with that whole-heartedly. They also have about every color and size of envelope you can imagine. I found a burgundy wine that reflected our wedding colors. A pack of 50 envelopes cost me about $8.80 with Anchor Paper's discount. This was cheaper than many online options, although there are certainly reasonably priced options online as well.
At the great suggestion of a girlfriend, I sought out some copper envelope liners. I found these A-7 Copper Metallic Liners on paperandmore.com. They are currently listed at $6.99 for a 25-pack. Keep a lookout for coupons for things like free shipping on paper goods websites.

Tags and Twine
My vision included tying everything together with copper baker's twine and a tag. I ordered the Copper Shimmer baker's twine from Etsy shop "InTheClear". It came in a spool of 240 yards for $12.45 (including shipping).

I love the shipping tag look and ordered a box of 1000 on Amazon for $9.99. These will come in handy for other wedding projects and other projects down the road. They are available in lesser volumes, but it was CHEAP to get the bulk box. I wanted to add some flair to the tags, so I used some copper leaf that had been handed down from a fellow DIY-er (available for purchase here) and ordered the special adhesive I needed for $6.20 on Amazon. (Note: The price does fluctuate for this product on Amazon.) You can also find this at Michael's or Hobby Lobby and put your coupons to use to make it about the same price.
Adhesives & Tools
I was already the proud owner of a cutting board, but if you don't have one, you need one! I recommend this one. I also stocked up on some craft glue sticks, glue dots, photo mounting squares, and double-sided table. All came in handy at one point in the process. I also read (too late for my own benefit) that Scotch brand makes some awesome double-sided adhesive rolling tools (example here) that make it easy to apply double-sided tape to your invite projects.
Design & Printing
My days of knowing how to do much with inDesign or Photoshop died upon going to law school, so I knew designing my own invites was out of my wheelhouse. I decided to turn to Etsy. What a treasure trove!! There are a ton of amazing designs and many shop owners willing to work with you to fully customize your invitation suite. I wanted something simple that I could print on kraft paper. That helped me narrow down the pool of options. I settled on this design from Teesha and Derrick's Etsy Shop. The design was $18. Yep, you heard me, under $20!! They were AMAZING to work with -- responsive, quick with edits, and changed wording and design to fit my vision. They have additional coordinating products that I absolutely plan to use for other aspects of the wedding.
Once you complete the proofing process, the shop email you a variety of high resolution documents to make them easily printable. After more research, I took the files to Zip Printing in Saint Louis Park. They were willing to use the paper I purchased from Anchor (in fact, they recommended Anchor) and were great to work with on the project. For $.11 cents a page, I was able to get the entire suite printed. They also were able to professionally cut everything for a low fee. The total cost for printing and cutting was $65.64 (with tax), even with ordered several extra sets of invite suites. I would highly recommend this print shop! Lucky for me, I learned the print shop at my job is willing to do jobs at $.3 cents a sheet, so I plan to do additional printing projects there. If your workplace has a document center, check out if they would be willing to do a personal project at a low fee.

Tag Making
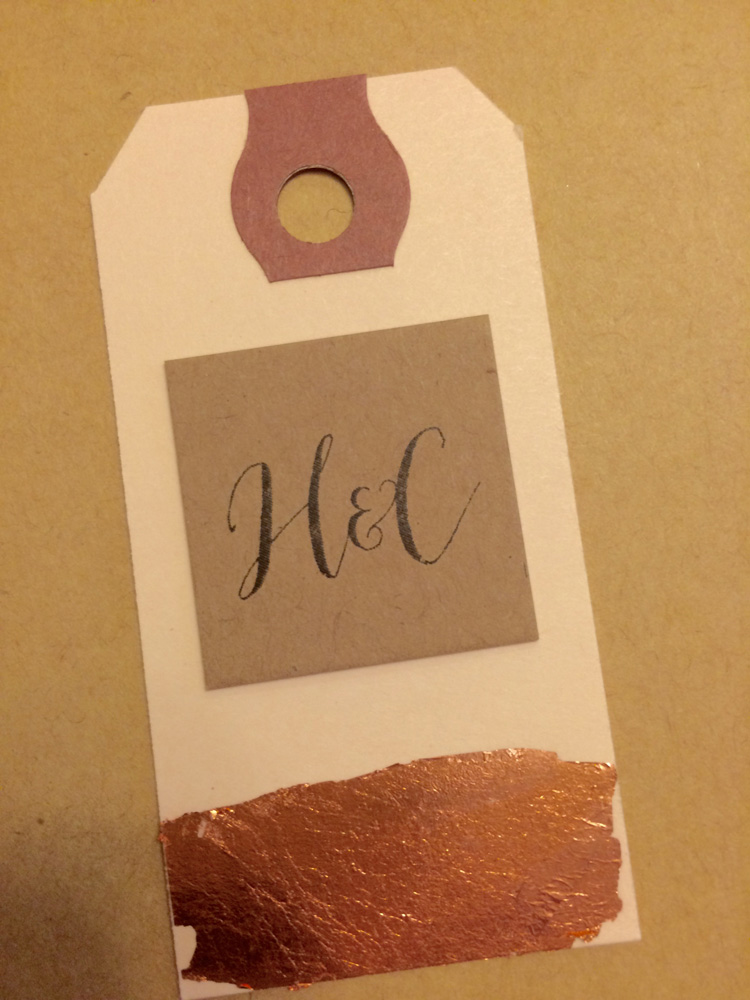
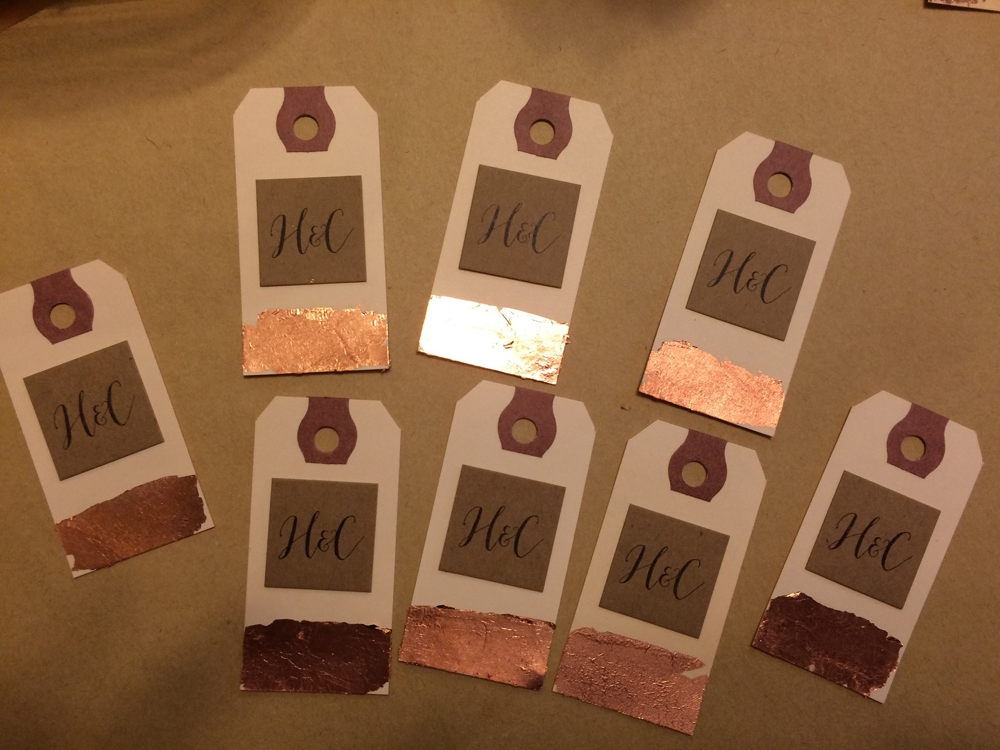
To copper leaf each tag, I painted on the adhesive with a paint brush and let itget tacky over 30 minutes. I then cut the leafing into strips and applied it. This was much easier than trying to use the larger sheet.

The invitation design included a monogram square that I had them scale down to fit on the shipping tags. After the copper leafing was dry, I used glue dots to secure them on each tag. Although it worked fine, double-sided tape would have likely worked better and kept them more flush with the tag. Too late for me, but lesson learned for those of you who have yet to embark upon your DIY invite adventure.
Envelope Liners
Lessons learned here as well. Admittedly, I did not do enough research here. The Interwebs would have said to start with double-sided adhesive tape. Instead, I started with craft glue sticks. It did not cause any bubbling issues, but several of them did not seem to want to stick. This was easily remedied by using the double-sided tape. The cutting board also came in handy at this stage because the liners did not exactly line up with the envelopes I had purchased. My mom worked tirelessly to slide of a small edge of each liner before we put them in the envelopes. A true labor of love.
Assembly
Once all the side projects were done, it was time to assemble. My hubby-to-be helped me put the suites together and came up with a pretty effective tying strategy! He also was the mastermind behind the spreadsheet numbering system to help us keep track as guests send back RSVPs. This is MUST DO and something every bridal magazine and blog post recommends.
While the process had its bumps in the road, I am really happy with how the invitations turned out. I took a vision and brought it to life for a fraction of the cost of many of the invitation suites I swooned over online. Keep in mind that while they create a first impression of your big day to guests, they also get thrown away! That helped me get over those few "lessons learned" points in the process.
