
Farmhouse Frenzy: DIY Wood Shelves

Farmhouse inspired decor has been all of the rage thanks to the rising popularity of vintage shops and shows like HGTV's Fixer Upper. I wish Chip and Joanna could pop on over and complete a home makeover for us, but that's probably going to have to remain in the "dream" category.
A few weekends ago, we installed our very own Fixer Upper inspired shiplap wall, but the big open space in the dining room was missing something.
We toyed around with what would be a good fit for the space. Of course, my DIY light bulb went on and I started pitching my husband on a set of farmhouse shelves. Luckily, after showing him a few Pinterest photos, he was sold. Plus, a trip to Home Depot doesn't require much arm twisting at this house.
What You Need
1 - 2" x 10" x 8' wood board
1 - small can Minwax Driftwood Stain
1 - small can Minwax Dark Walnut Stain
4 - metal brackets (size should be in proportion to shelf depth)
We chose construction grade wood for our board, which was just under $9. Looking back, we may have upgraded to a little higher quality wood like pine, but this worked just fine. First up, you'll need to cut the board in half. If you don't have a saw at home, you can get the boards cut at your local Home Depot, Lowe's, or Menards. The edges of the board were somewhat imperfect, so we cut those off, too. Next, you'll want to sand the two shelves. We used a power sander, but you can do this with a sanding block or sandpaper. All of those items will be available at your local home improvement store.
After the boards were cleaned off and ready, we stained them. In researching good farmhouse stains, I came across one post that suggested mixing Minwax Driftwood Stain with Minwax Dark Walnut Stain (links above). We mixed at a 50-50 ratio to achieve the color in the photos. The cans cost between $3-$4. We already had some Dark Walnut stain around and it comes in handy for all kinds of projects. If you haven't stained anything before, don't be intimidated. It's really hard to mess up! Use an old t-shirt to rub on the stain and wipe off any excess before letting it dry.

After two coats of stain, Chris applied a light coat of polyurethane sealant. It's not a requirement, but helps seal in all of the stain. After the boards were all dry and ready to go, we moved them inside to hang up.
The brackets we decided on were a standard size and design in a matte black. They ran about $4 a piece at Menards. Because we planned to have items setting on the shelves, we made sure to attach the brackets where studs were located in the wall. The brackets were also then screwed into the wood. They are sturdy!

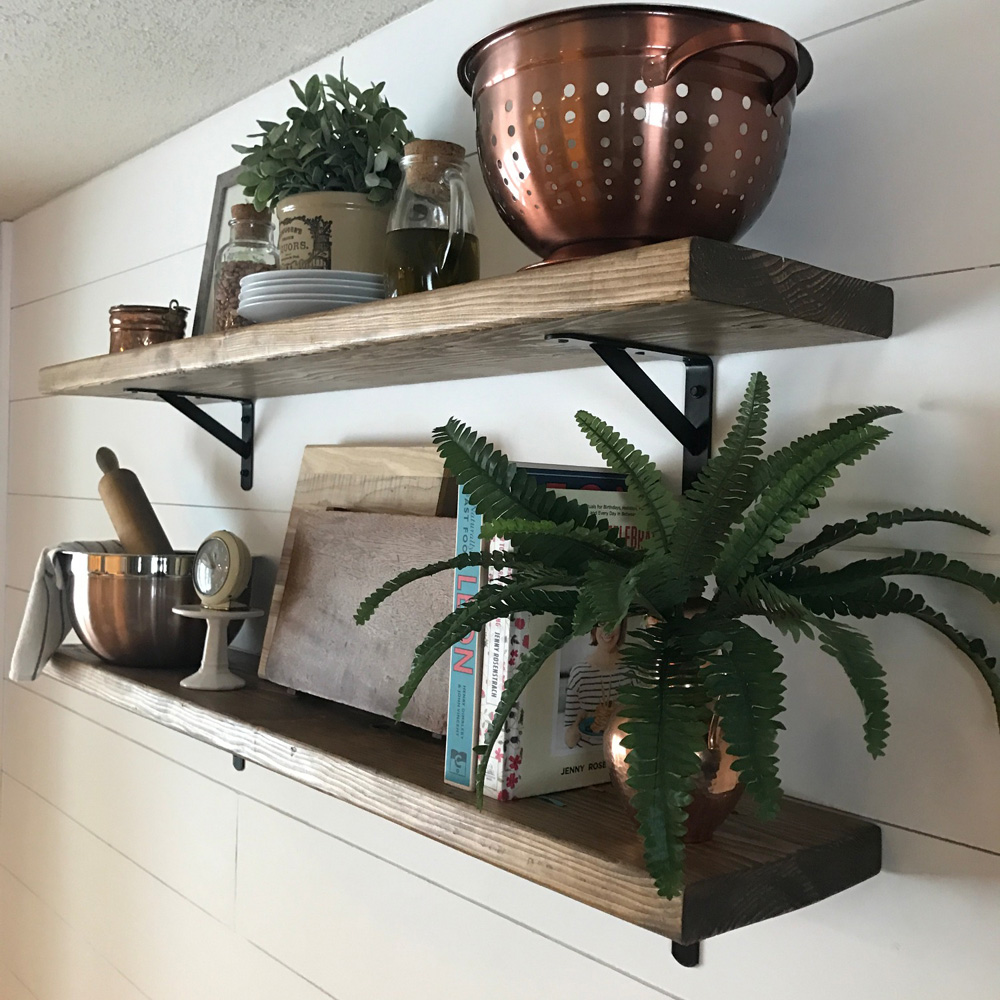
Once the shelves were up, it was time to start decorating them! There is a lot of good inspiration online if you just want to brainstorm the types of items that might look good. I started by looking around the house and found several things that I had already purchased in the past:
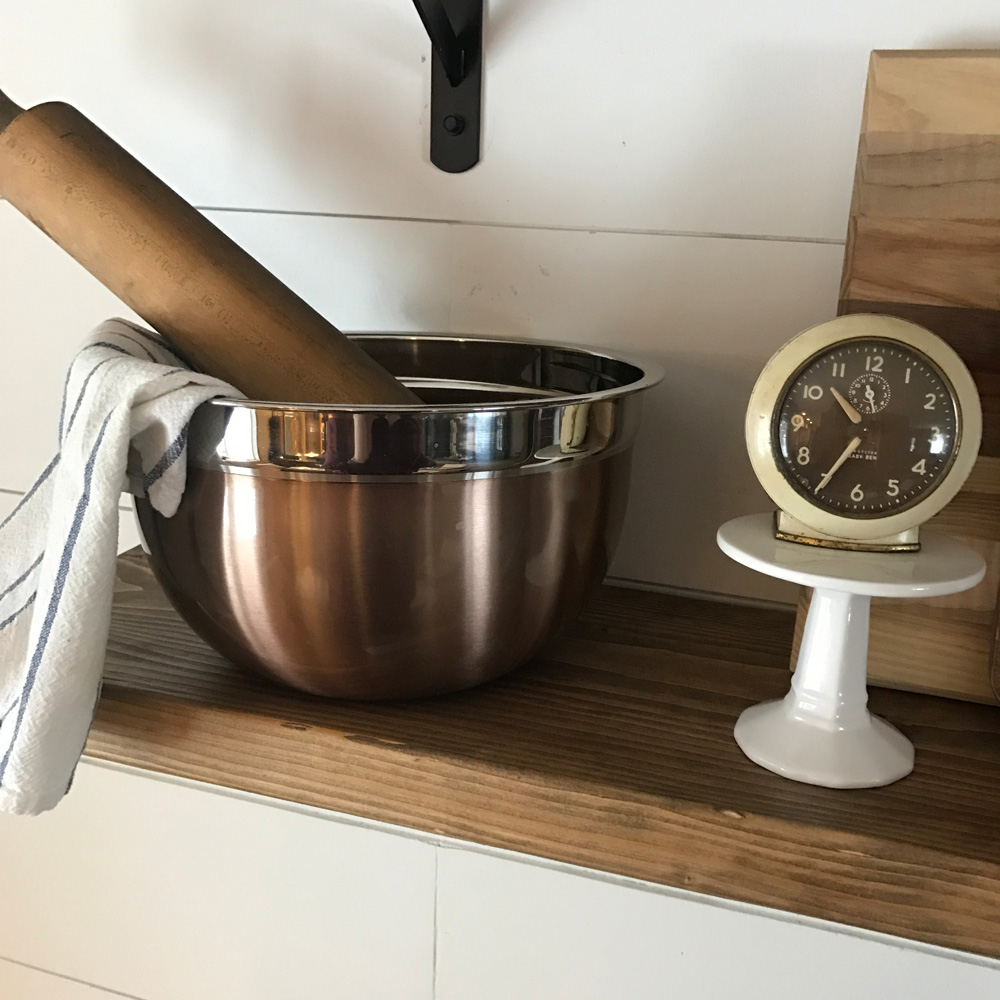
Copper Colander (Walmart)
Copper Mixing Bowls (Crate & Barrel)
Wood Cutting Boards (Pottery Barn + Local Artist)
Cookbooks (How to Celebrate Everything +LEON: Naturally Fast Food)
White Plates (Crate & Barrel)
Tea Towel (Ikea)
Vintage Clock (The Cottage House)
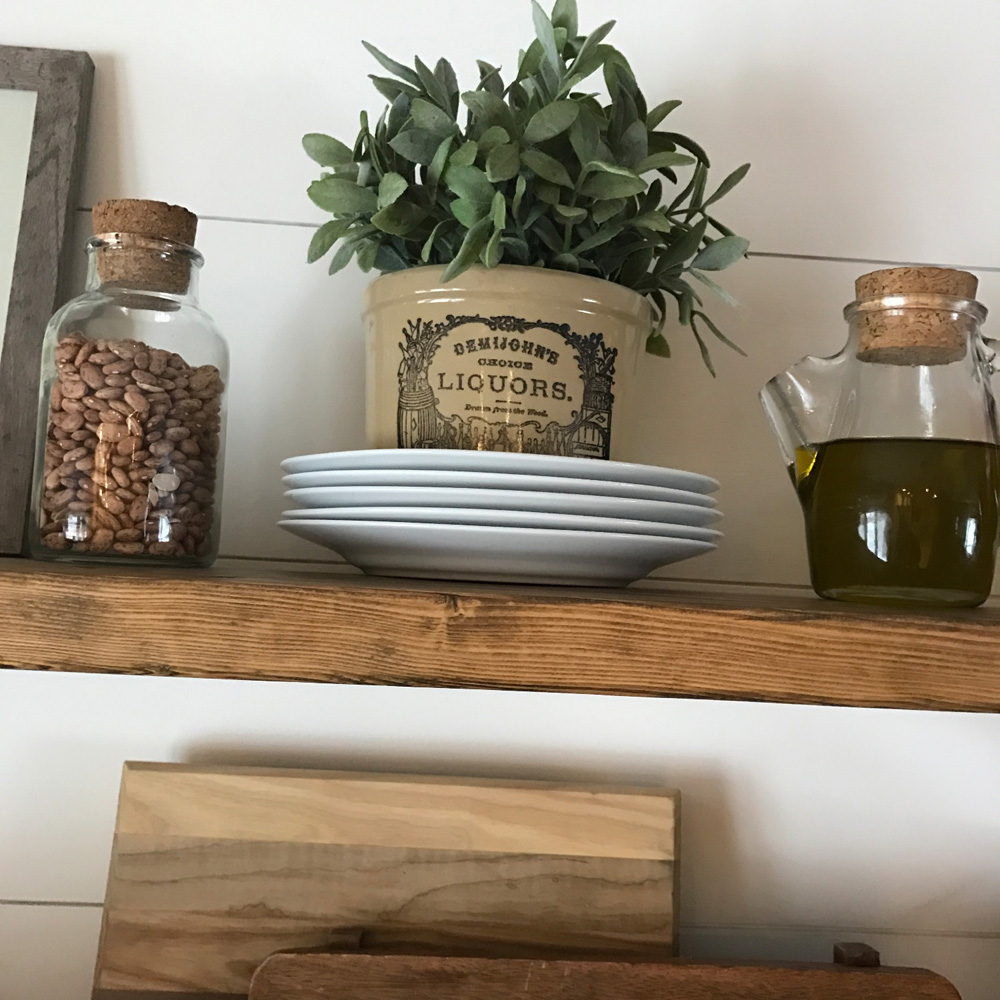
Faux Plant (Ikea)
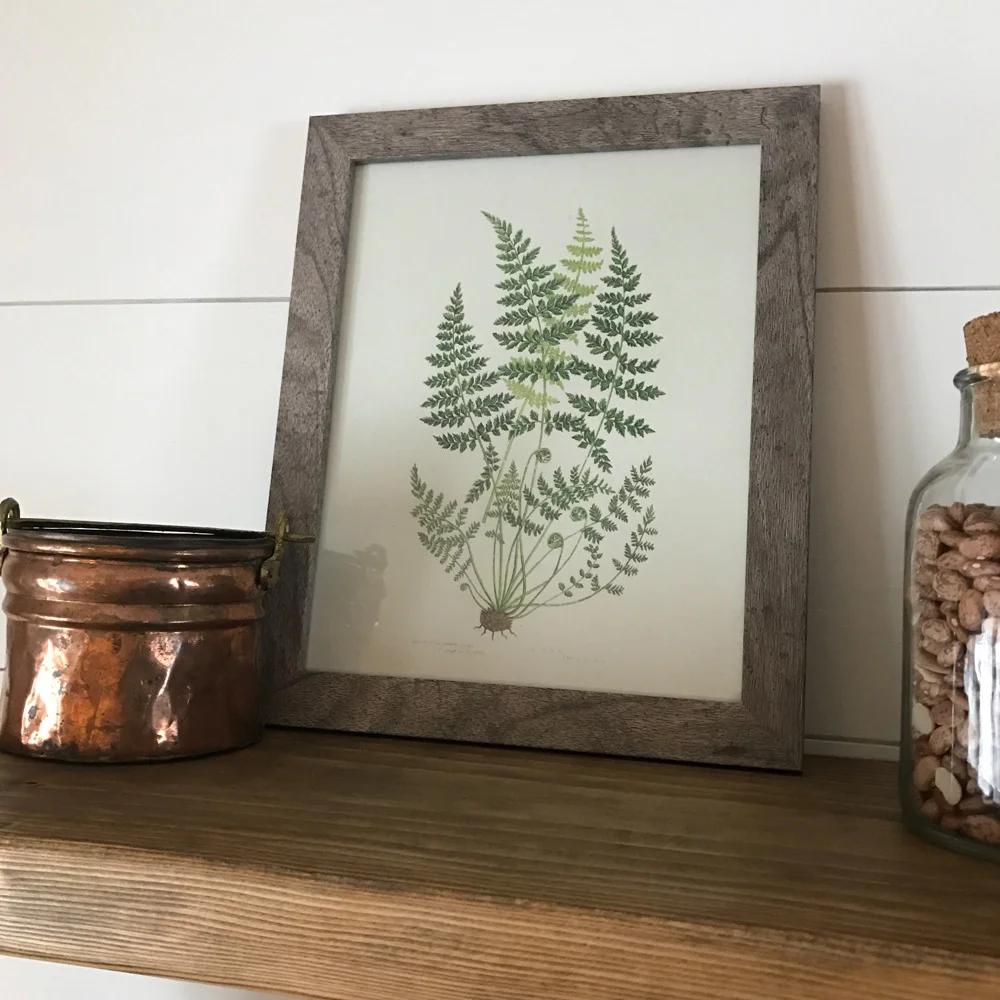
Vintage Copper Pieces (Goodwill)
That was certainly a great start, but I still needed a few more items to complete the look. Thrift shops and antique shops are a great place to grab those "farmhouse" style finds without a huge price tag. Once of my first stops was my local Goodwill and I left with some amazing finds:
Vintage crock
Cork sealed glass containers
A glass punch bowl (It's not on the shelf, but was perfect for my St. Patty's Day punch)
I also got a vintage rolling pin from Country Styled Accents -- one of my favorite occasional shops in the area. Don't live in Minnesota? Check out the online shop's offerings of farmhouse decor goodies.
I filled the glass containers with dry beans I picked up at the grocery store and the faux plant I had from Ikea fit perfectly into the crock I found at Goodwill. Ikea has a variety of styles of these plants and they are only $3.99!
I picked up a few other additional items at Michaels and Hobby Lobby:
8 x 10 Gray Belmont frame (Michaels)
Free fern printable from Style Me Green
Faux fern (Hobby Lobby)
The Belmont frames are often on sale for low prices and they come in a variety of neutral colors. This week they are on sale for 70% off. You can also often find sales on faux greenery at Hobby Lobby. I got mine for 50%, making the fern only $2.50.
I spent a little time arranging and rearranging until I liked where everything was situated. With styling shelves, it's a little trial and error until you like how everything looks put together. Once I had the shelves situated, there was still something missing on the wall as a whole.

I decided something needed to hang underneath the shelves. I considered some kind of sign, but then I had the epiphany that it could be the perfect spot for a woven tapestry. Woven wall hangings and macrame have been the all the decor rage lately and I was excited to see if this spot might work! I picked a neutral one out from Target and ended up getting about $7 off between an online promotion and my 5% off, costing me about $20. That was my splurge item for this project. I just love how all of this came together!
