
Who Has the Rings? A DIY Wooden Ring Box with Copper Mosaic Heart
For this week's Wedding Wednesday, I am featuring our DIY wooden ring box.

As a wedding gets closer, you are swimming in details, details, details. For us, this ranged from writing our own ceremony, vows, and plenty of decor projects.
One of the details that I'd been set on was having a ring box for detail photos of our wedding rings. In following the most beautiful Instagram accounts, I fell in love with The Mrs. Box, which makes beautiful velvet ring boxes. These little beauties are featured in all kinds of styled wedding shoots and I know a couple of friends who had them as a part of their own wedding day photos. As beautiful as the boxes were, I just couldn't justify the $75 price tag. I knew I wouldn't personally store my ring in it every night, so it seemed like it would mostly be one-day use sort of item.
Abandoning the idea of the velvet beauty, I started looking at other options. I started by thinking about our wedding color pallet and the elements we were incorporating throughout our decor. One of the key elements we planned to use was wood. It really fit with our warm, fall feel and the burgundy and copper color pallet we chose. To start, I looked for wooden ring boxes on Pinterest and Etsy. After gathering some ideas, I set out to make one of my own!
What You Need
Unfinished Wooden Ring Box (Michaels)
Wood Stain (Home Depot $4.38 for 8 oz. can - any finish is fine)
Staining Gloves (any plastic, disposable gloves)
Old rag/t-shirt
Contact Paper (Home Depot $11.37)
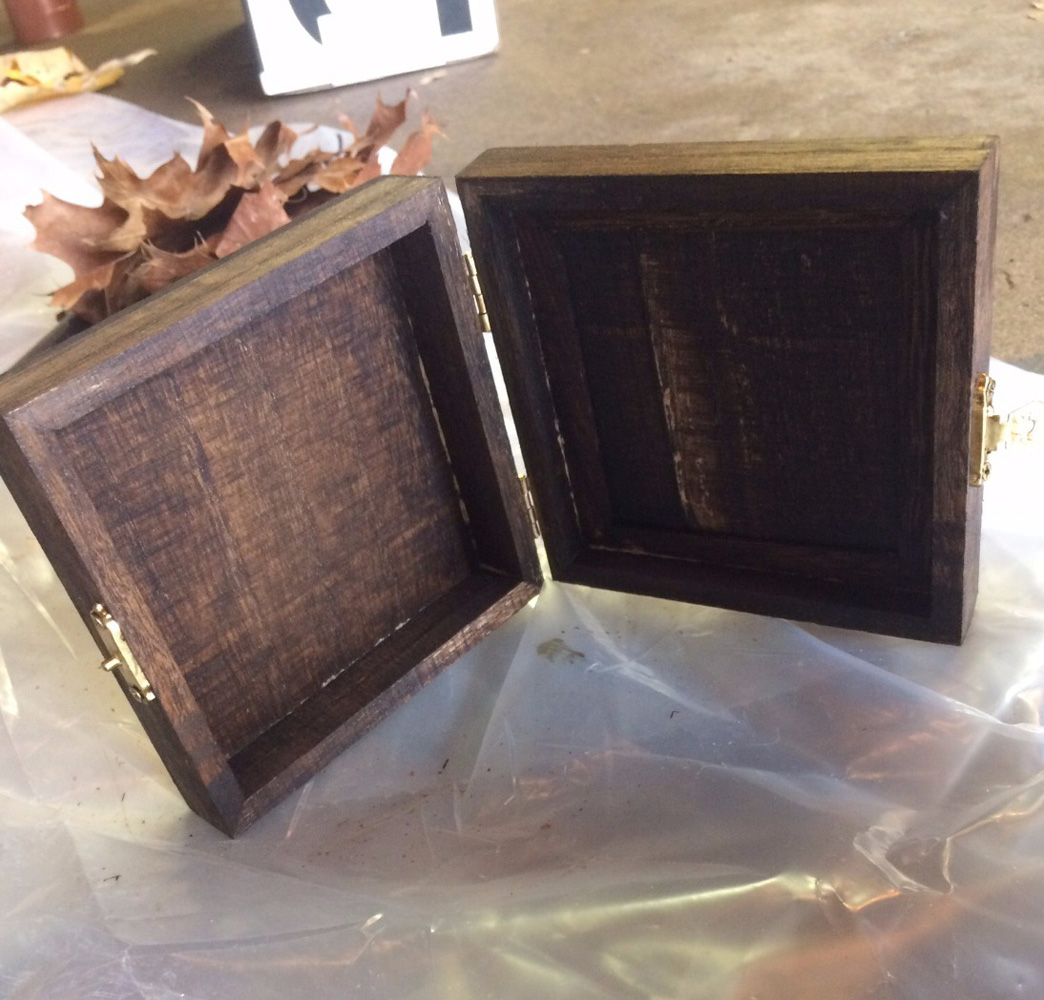
I picked up a set of two (varied sizes) unfinished wood boxes at Michaels. These are usually priced around $5 or under and you can often use your 40% or 50% off one item coupon to drop this price even lower.
Once you've selected your box, you'll need to choose a stain. This project doesn't require much stain, so no need for a large can. I chose a darker stain to go with other wood elements in the decor. Any finish will do, as long as you like it. If you don't have stain around, you can buy small cans of it at a local craft store or a hardware store. I linked to the finish I used in the "What You Need" list above.
Now that you have your stain selected, choose a space where you'll stain the box. I recommend doing it in a garage or area of the house, like a basement, where you won't be able to smell the stain while it dries. Lay out some kind of plastic or drop cloth to stain on top of to avoid mess.
To stain the box follow these steps:
Open your stain.
Put on plastic gloves.
Dip an old rag or piece of a t-shirt into the stain. Remember, you don't need a lot and can always add more.
Rub the stain onto the wood box. Repeat until the entire box is covered in stain.
Wipe excess stain with additional old rag or piece of old t-shirt.
Let dry for several hours or overnight (recommended).
Don't be intimidated by stain. It's a very forgiving medium and hard to mess up! I find it much easier than painting something!
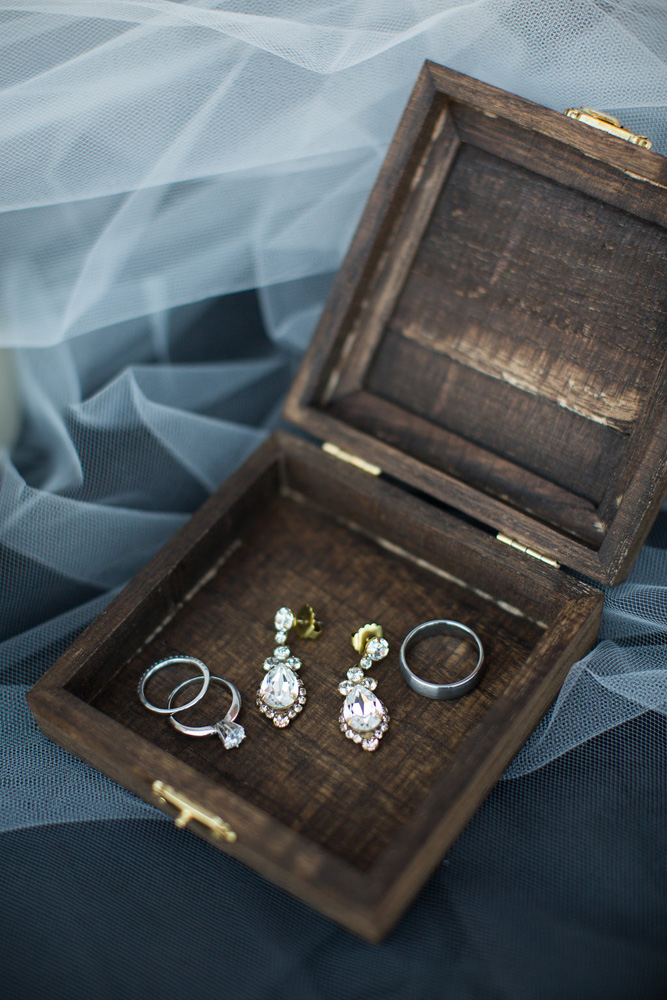
After your box has dried, decide how you want to personalize it. You could certainly use paint markers to add initials or a date. You could also use a wood burning tool to personalize it as well. I chose to add a mosaic heart made of contact paper. You could use any color, but I chose the brushed metal copper contact paper (listed above in materials). I cut ten small squares that were the size of the squares that make up the cutting line grid on the back of the contact paper. I then cut the squares in half (diagonally) to create triangles.

Next, I placed them in a pattern to make a heart. Follow the layout pictured below to achieve this look. If you have a larger box, you'll want to cut larger squares.

When you are comfortable with the design, peel the backs off of the triangles and place them directly on to the wood. You may want to place something heavy on top to help ensure the adhesive will stick and let it sit for a bit.
Wit that, you have your complete ring box! It photographed beautifully and our little ring bearer looked so cute as he proudly carried it down the aisle!

Wedding photos: Carly Jo Studio