Holy Shiplap! Installing a DIY "Fixer Upper" Style Wall on a Budget
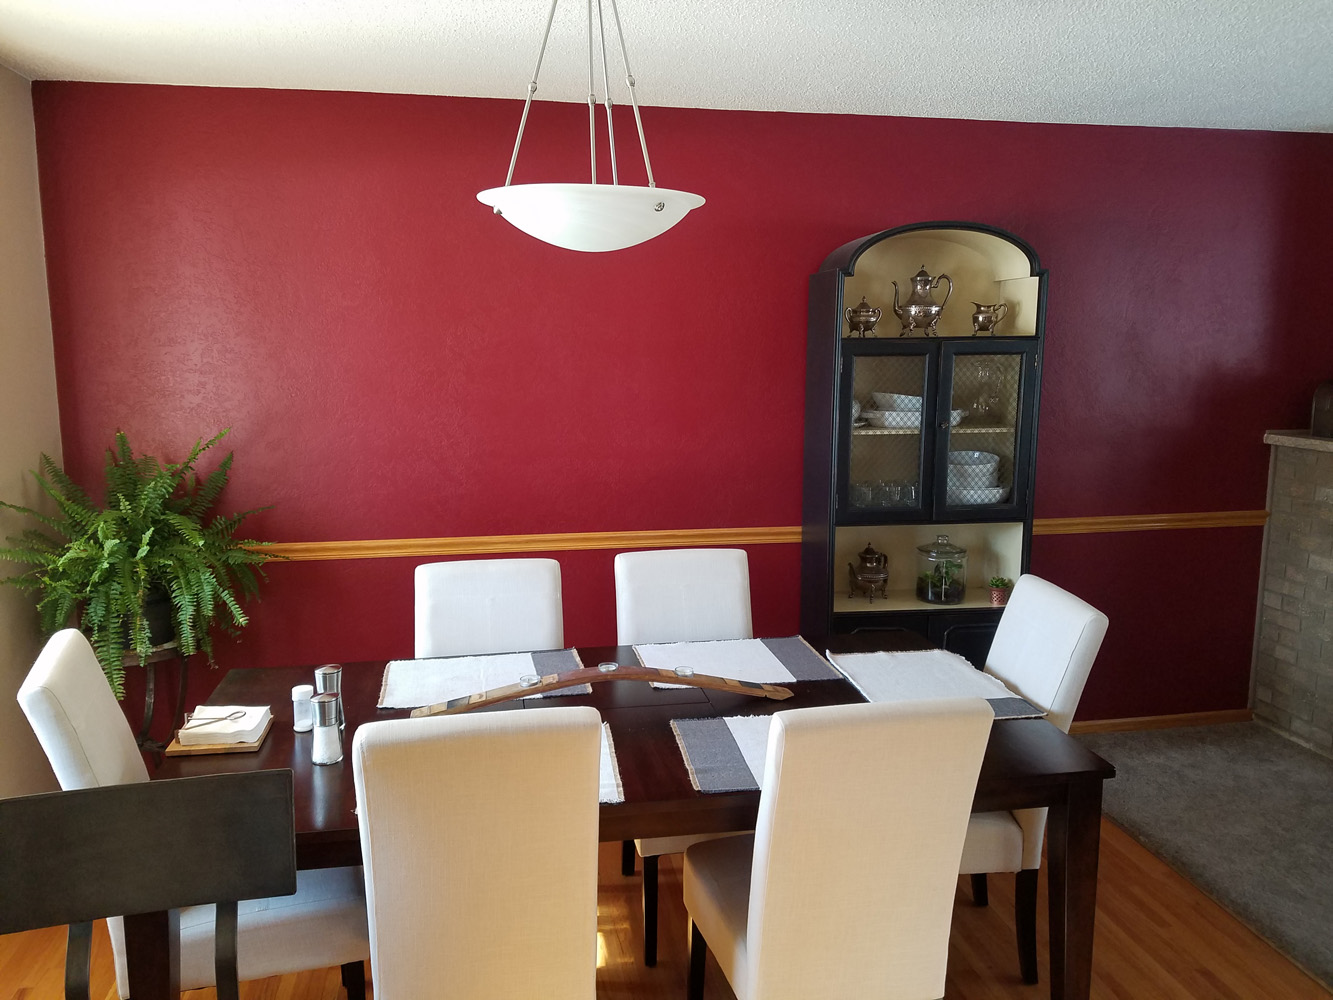
If you've been a dedicated reader of the blog during the last couple of years, you probably remember seeing posts with a very dominant red wall behind our fireplace. It wasn't so bad for Halloween or Valentine's Day (I guess), but I was not a fan.
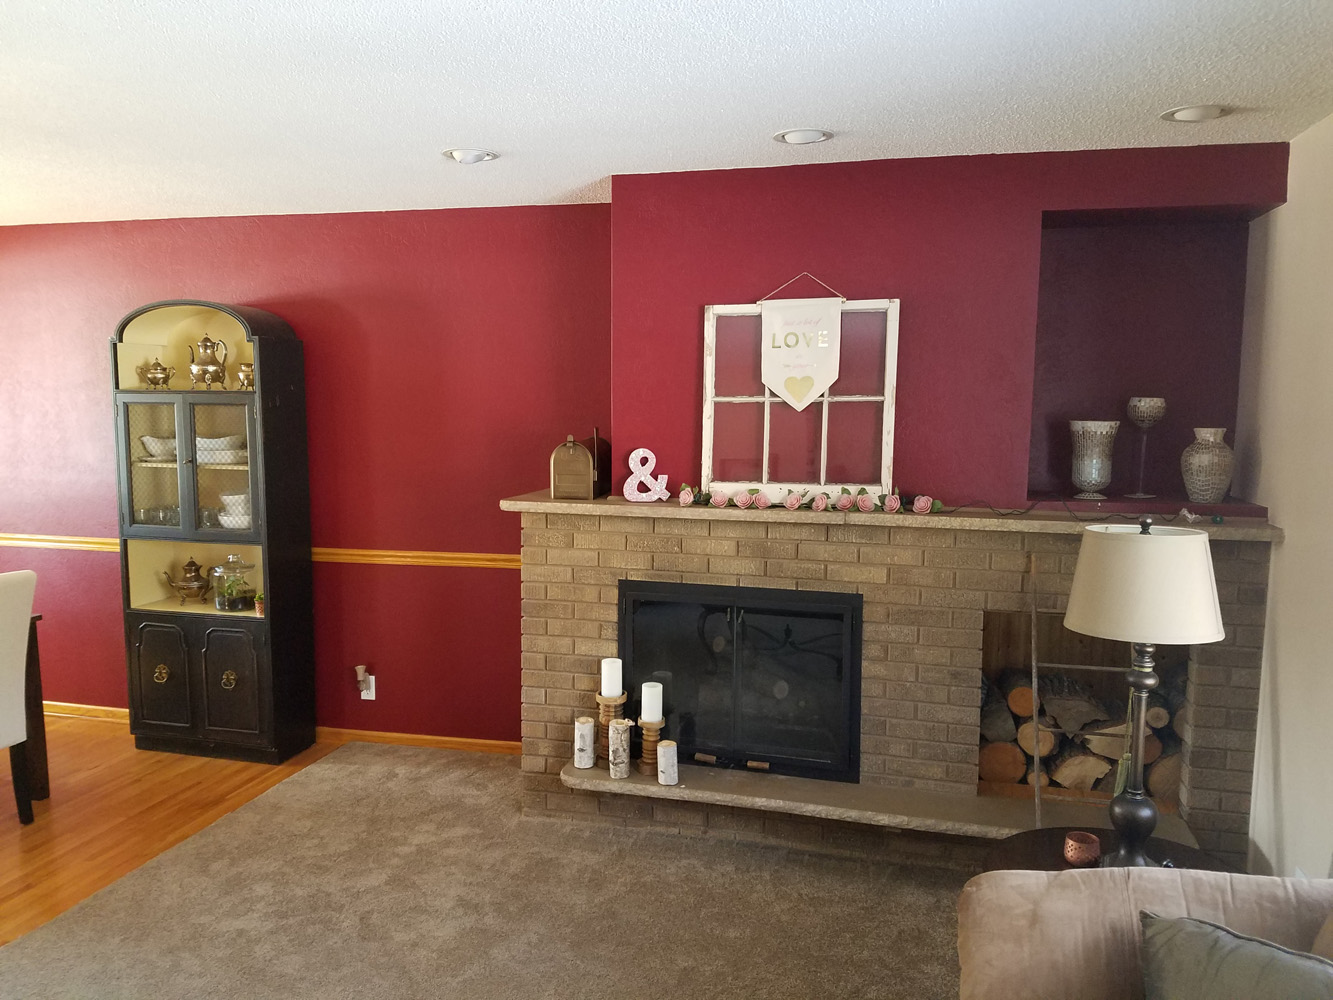
My husband would be happy to tell you about my dislike for the wall. He generally followed up any of my complaining with a simple question of, "Well, what do you want to do with it?" or "What color would you like it?" Of course, this only led me to a decor/remodel downward spiral of if we paint this, then we have to do this, and then what color for that, and then do we need new furniture? And what about trim color? So, you can guess that didn't really help move us forward on the task at hand: the red wall.
Finally, one cold, winter day here in Minnesota, I stayed home sick with a bad cold and like any other DIY obsessed person who is couch-ridden, I binged a lot of HGTV that day. I had heard the buzz about Fixer Upper, but hadn't really watched an episode. Well, fast-forward to me loving Chip and Joanna and, of course, shiplap.
By the time my husband came home from work, I was ready to pitch him on this idea for the dreaded red wall. Lucky for me, he liked the idea and had the tools to make it happen!
What You Need
Tools
Paint Supplies (rollers, brushes, trays)
Nail Gun (18 gauge)
18 gauge brad nails
Table Saw
Miter Saw
Hole Saw (If you have an electrical outlet on the wall)
Pry Bar (the Stanley Wonder Bar is good to have around the house for lots of projects)
Tape measure
Sander
Level (4 foot and small one)
Materials
Trim
White Paint (or desired color)
Nickels (8-10)
Spackle

Anytime you're starting a home improvement project like this, it's a great idea to check out and compare existing tutorials on Pinterest and YouTube. There are several DIY Shiplap posts, videos, and tutorials out there and, not surprisingly, some are better than others. Here are a few links to some of the tutorials we looked at: Jenna Sue Designs, Wife in Progress, and My Love 2 Create.
Our main takeaways from our tutorial research were:
1/4 inch plywood seemed to work well. The tutorial from My Love 2 Create warned against using tempered hardwood and we listened! Plywood has a reasonable price point (about $19 a sheet), seemed sturdy, and was the preferred material in many of the tutorials we reviewed. Some tutorials where people tried to use cheaper or thinner materials had problems with bowing of the boards or completely had to scrap the projects and start over.
Have Home Depot or your home improvement retailer of choice cut your boards for you. One, it reduces how much you'd need to use a table saw. Two, it makes it much easier to transport the boards home and you can get right to work on the project!
Nickels will work for spacing the boards. We looked at tutorials with tongue and groove boards and real shiplap products (holy expensive!). You don't need to buy a product with the spacing built into the install. We used nickels to space out the boards and while it won't be perfect, the imperfections add character and you can barely notice it.
You don't need to paint over the wall or remove the wallpaper, but realize you need to do some pre-work if you are taking the nickel spacing approach. If you'll be able to pseudo see to the wall, you'll want to take that into consideration. We painted white in between each board install to help eliminate any chance of seeing the red. This will be discussed in more detail below.

Now to jump into our install process! We were tackling a pretty large wall with some corners and a fireplace, so that did require a little bit more upfront measuring, math, and strategy. Thank goodness for husband who is much more talented than I am in those areas! He sketched out the wall and took detailed measurements to determine approximately how many 8 foot boards we would need cut. He also determined the best way to pattern out the shiplap and what molding we'd need to tackle the corners.
If you are doing this on a less complicated wall, some of this process will be easier. Keep in mind, however, that many walls in a home aren't perfectly straight, so there may be imperfections, and that's okay!
When you get home with your cut boards, use sandpaper or an electric sander to smooth out the boards. Once you've completed that, you can start to move on to installation.

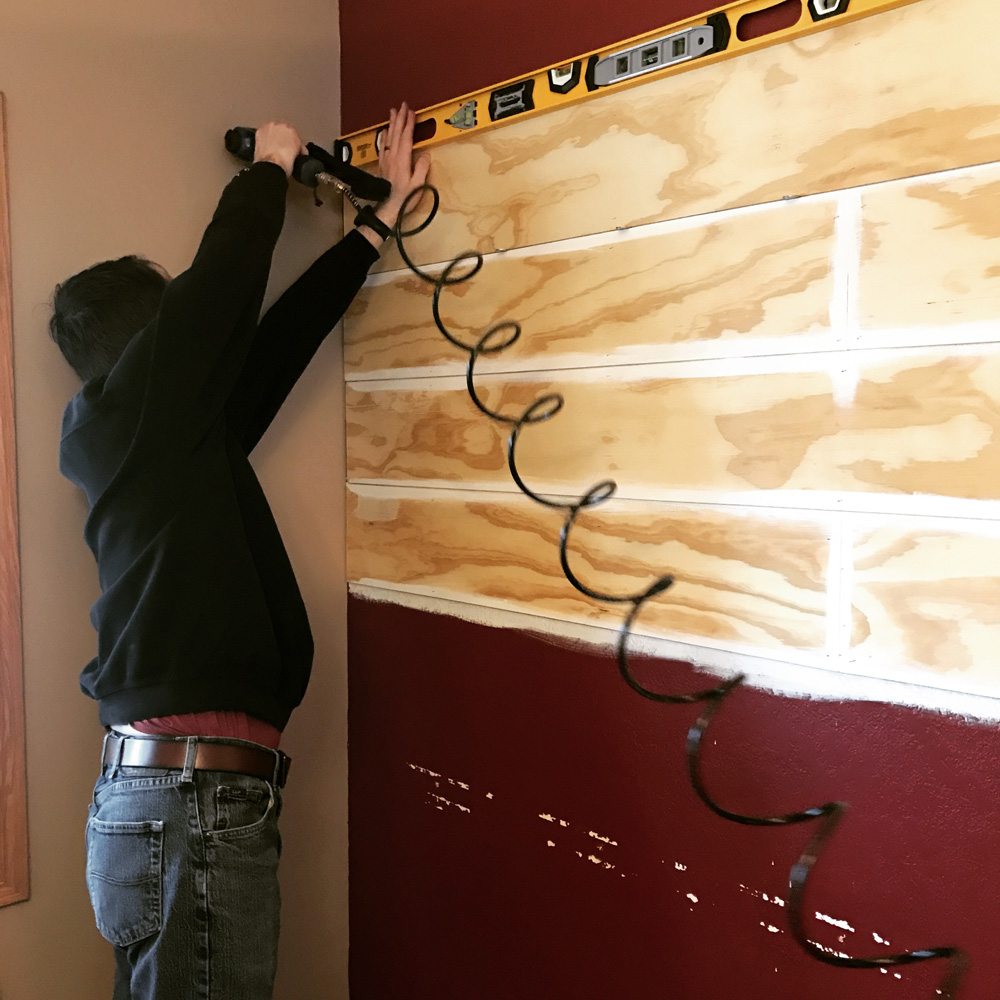
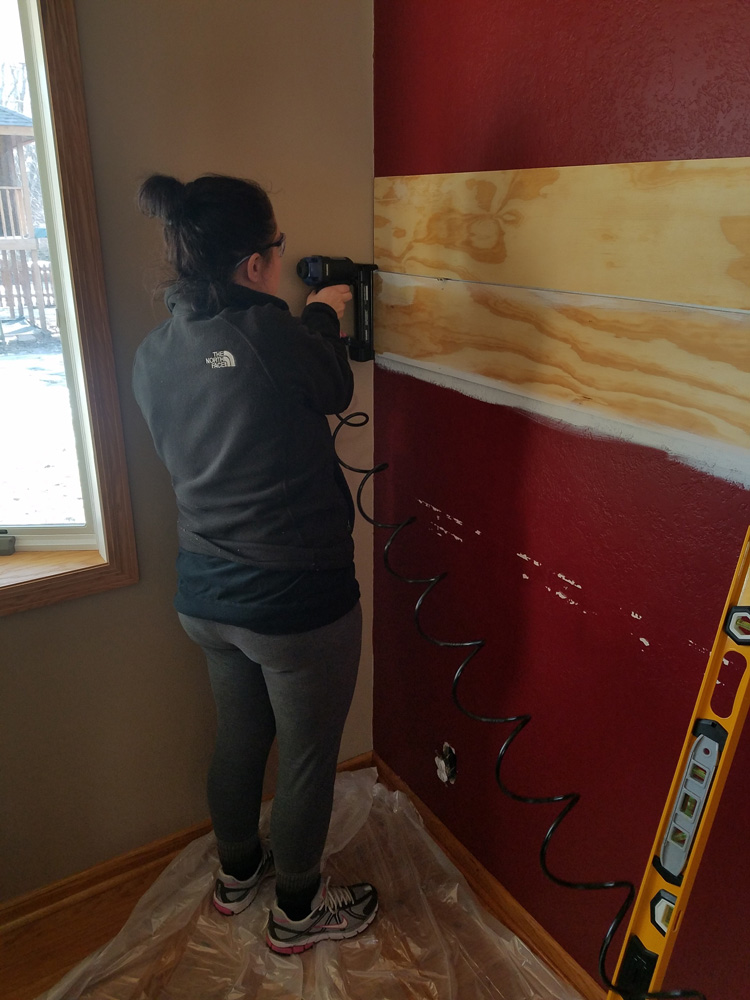
Using your determined pattern and measurements, install the first row of boards, securing it to the wall with a nail gun. We tried to put two nails lined up vertically on the left side, middle, and right side of the board. Line these up to the best of your ability as you add more rows.
Many of the tutorials suggested starting at either the bottom or top of your wall. While that may be a best practice for a more straightforward bedroom wall, we determined it would be best to start in the middle. Because we had the fireplace, it allowed us to control having a full board in the middle of the fireplace. It also allowed us to avoid having a thin board on either the top of bottom of the wall.
Using the nail gun, we attached the first row of boards, keeping in mind the pattern of seams. Once a row was installed, we painted along the top and bottom of the board to avoid the red shining through the spacing.

Using nickels, we then placed the next set of boards on top and continued our way up the wall. As you nail the boards, keep in mind that you'll want the nail holes to line up to go into the studs in the wall. You can also see the 4 foot level at work here to make sure we got the boards as straight as possible.

Once we got to the top of the wall toward the ceiling, we had to use a table saw to cut down the top row of boards. It was only a few inches different than the rest of the boards, so you really can't tell it's much different in width than any of the other rows of boards.

If you have any outlets on the wall, you'll need to put the board over the outlet and trace where the box will need to be cut out. Using a hole saw, you'll cut the rectangle out. You can see here, the cutting occurred on two of the boards to fit around the outlet. Similar steps will need to be taken if you have a wall register. This is where planning ahead is important!

Once all of the boards are on, it's time to fill in the nail holes. We used spackle to do this. A little goes a long way here. I went a little hog wild and we had to sand them down. You can also spackle in the cracks if you'd like, but we let them be.
To paint the wall, we used a combination of paint roller brushes, regular brushes, and some skinny craft brushes to get in between the cracks. We used Behr's Polar Bear in a matte finish. It took about two coats and a few little touch ups here and there to cover the wall.

While the main coats of paint were drying, my husband worked on measuring the trim we needed for the corner edging. After cutting and fitting those, he painted them in the garage and let them dry before attaching them. Our fireplace already had trim around it, so we reused that and painted it white as well.
Once everything was dried and assembled, the project was complete! You may notice the little cutout is also gone. We decided to frame that in to make adding the shiplap to the mantel space easier. And, to be honest, it was kind of a dark and goofy space anyway!
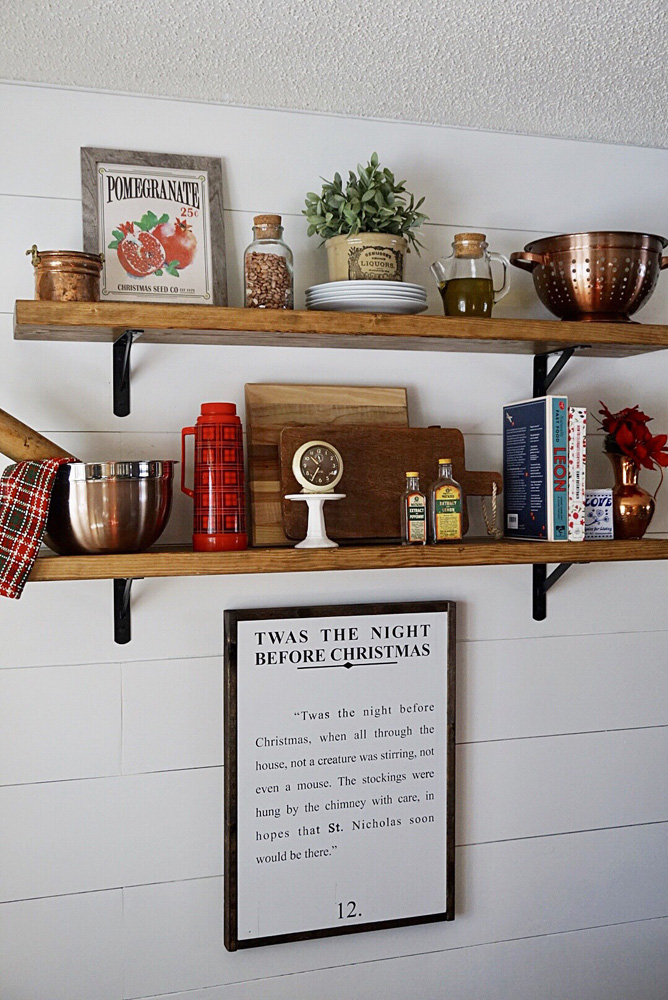
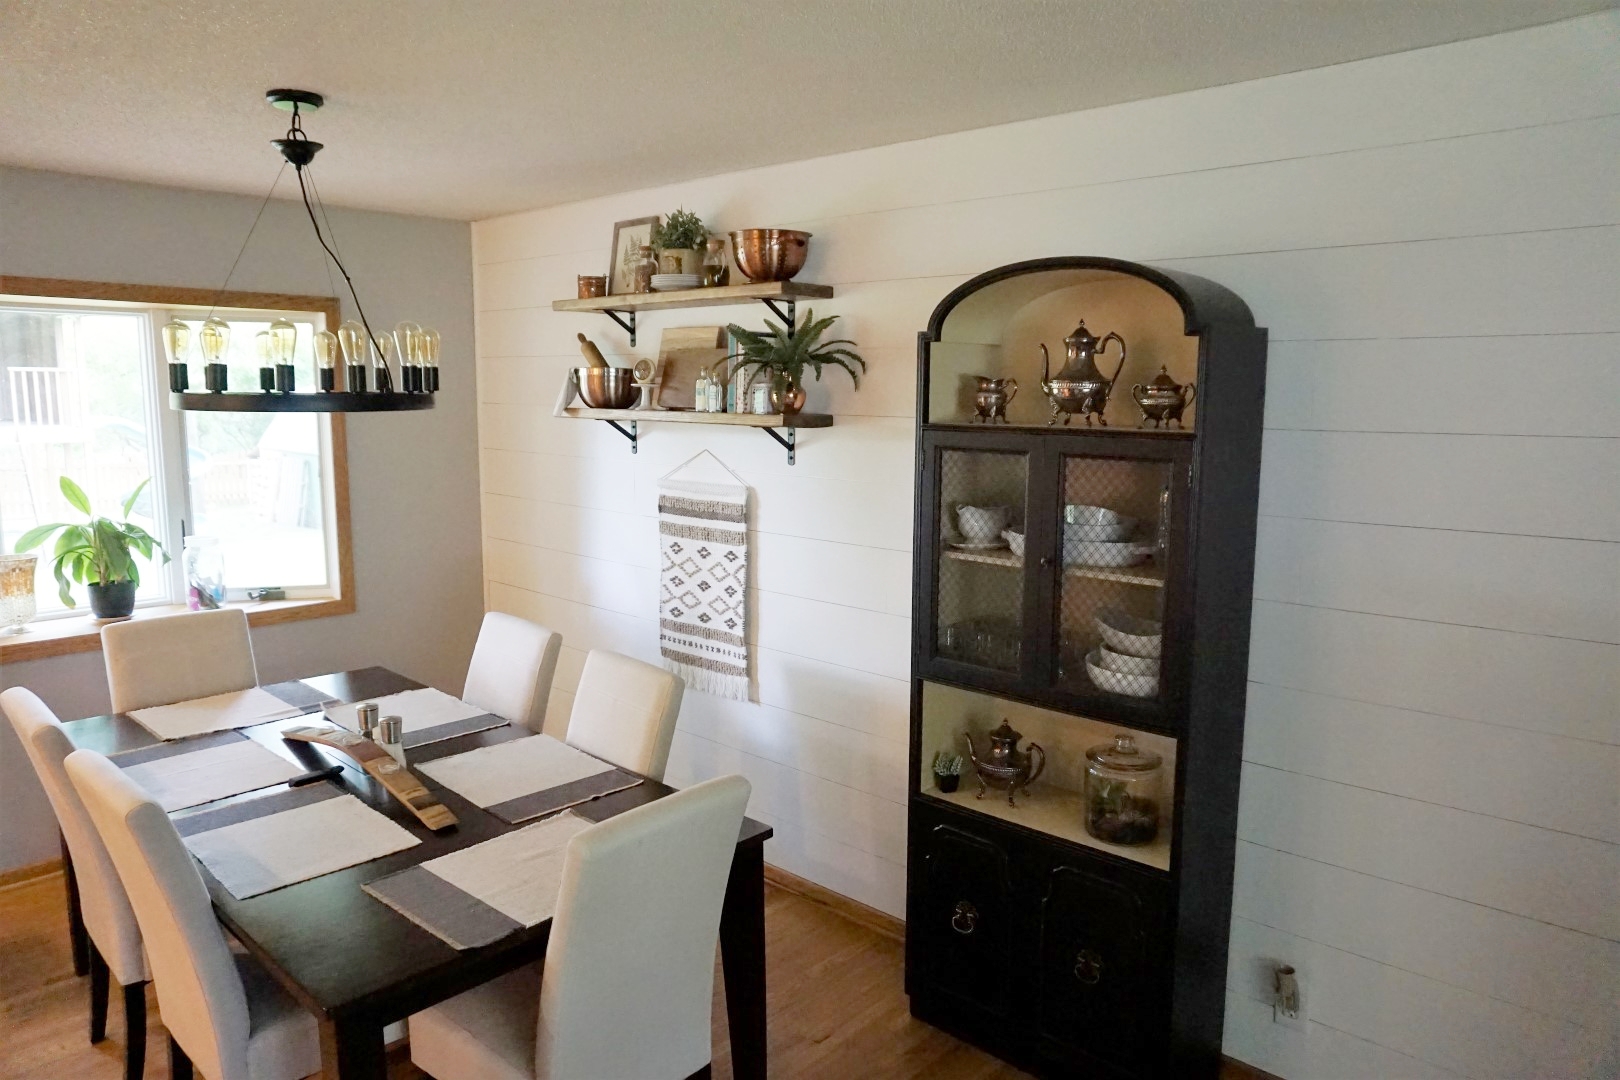
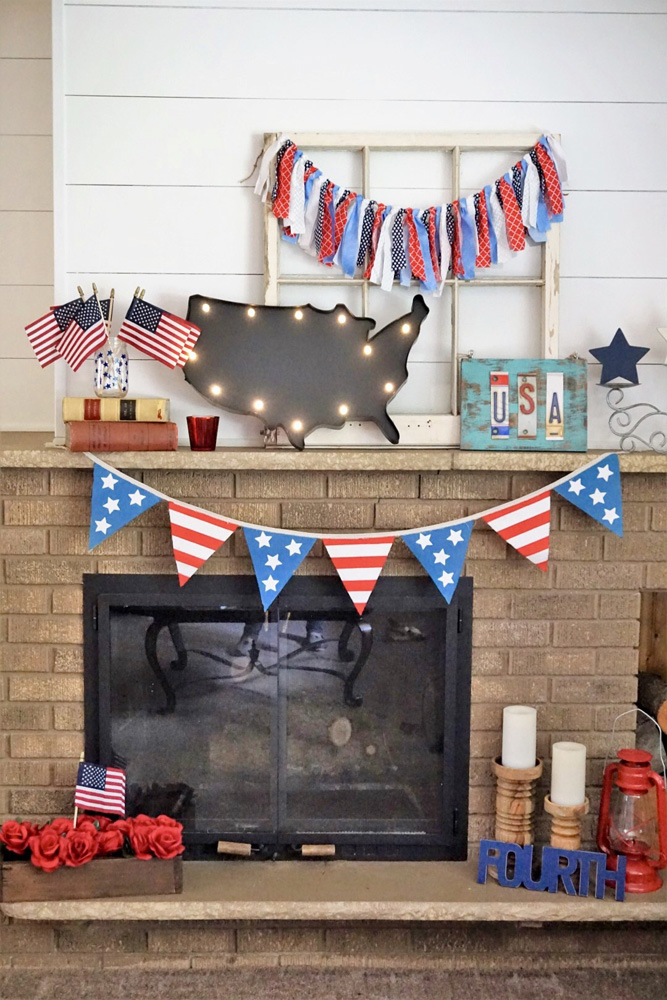
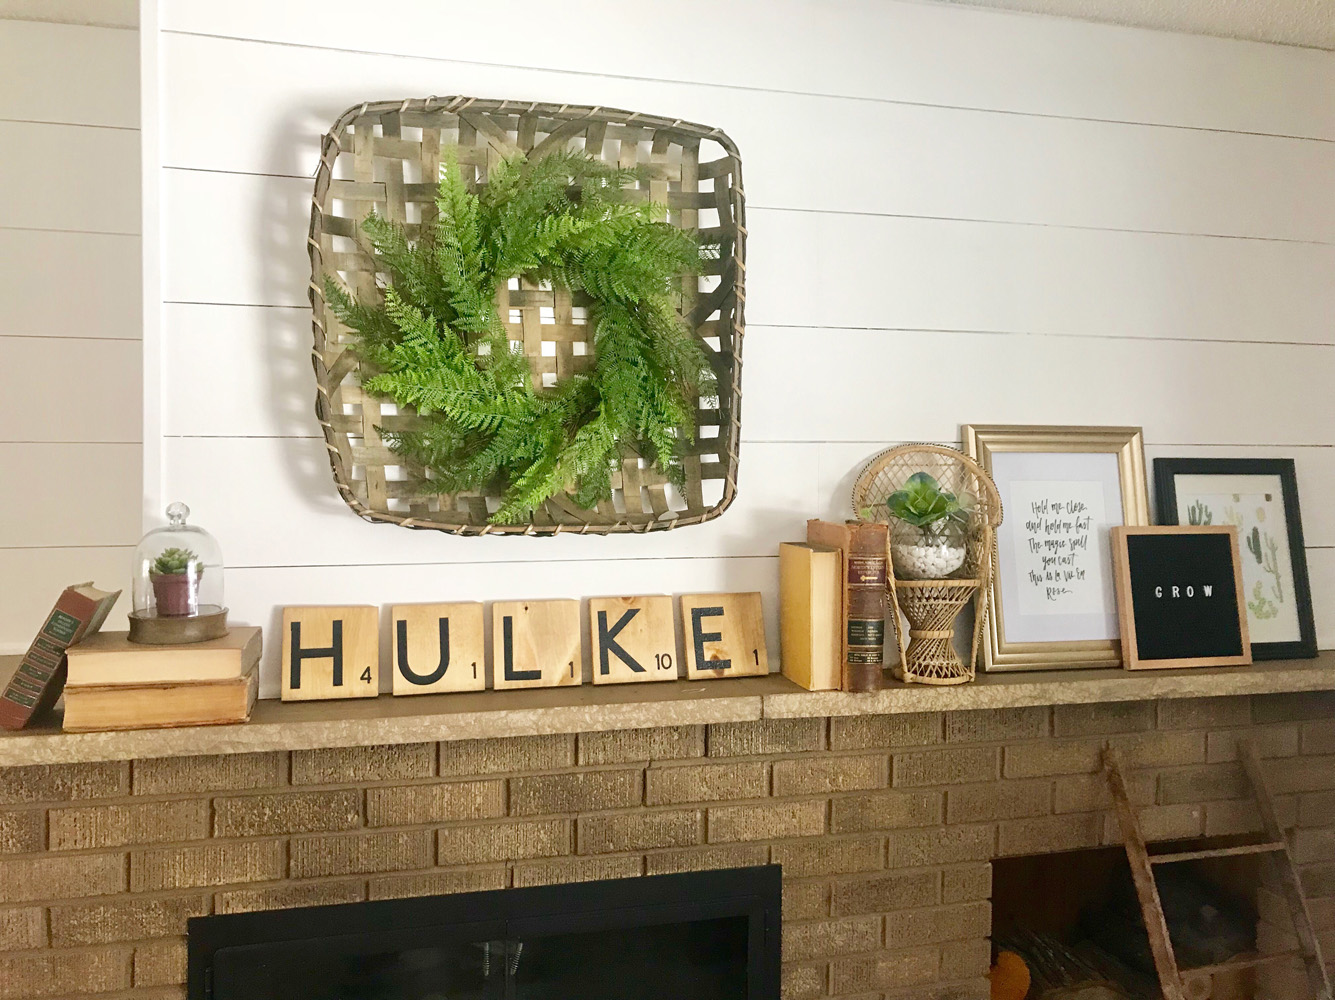
I love changing over our mantel to different holidays and we added some DIY farmhouse shelves to the dining room space. It all looks so awesome up against the shiplap!