
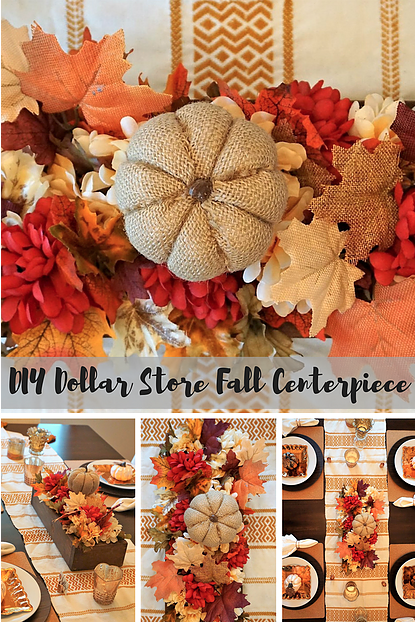
Dollar Store DIY: Fall Foliage Centerpiece + Tablescape Tips
Fall is officially here!! It is by far my favorite season and I am excited to be sharing lots of fun ideas for Fall & Halloween over the next several weeks!
The dining room table is a great place to start with your seasonal decor. Even a few small changes like different placemats and a new centerpiece can bring some festive fun to your home and it doesn't have to cost you a fortune.
Today, I am walking through how to make your own DIY Fall Centerpiece along with some other tablescape tips. The great part? All of the materials can be found at your local Dollar Tree.
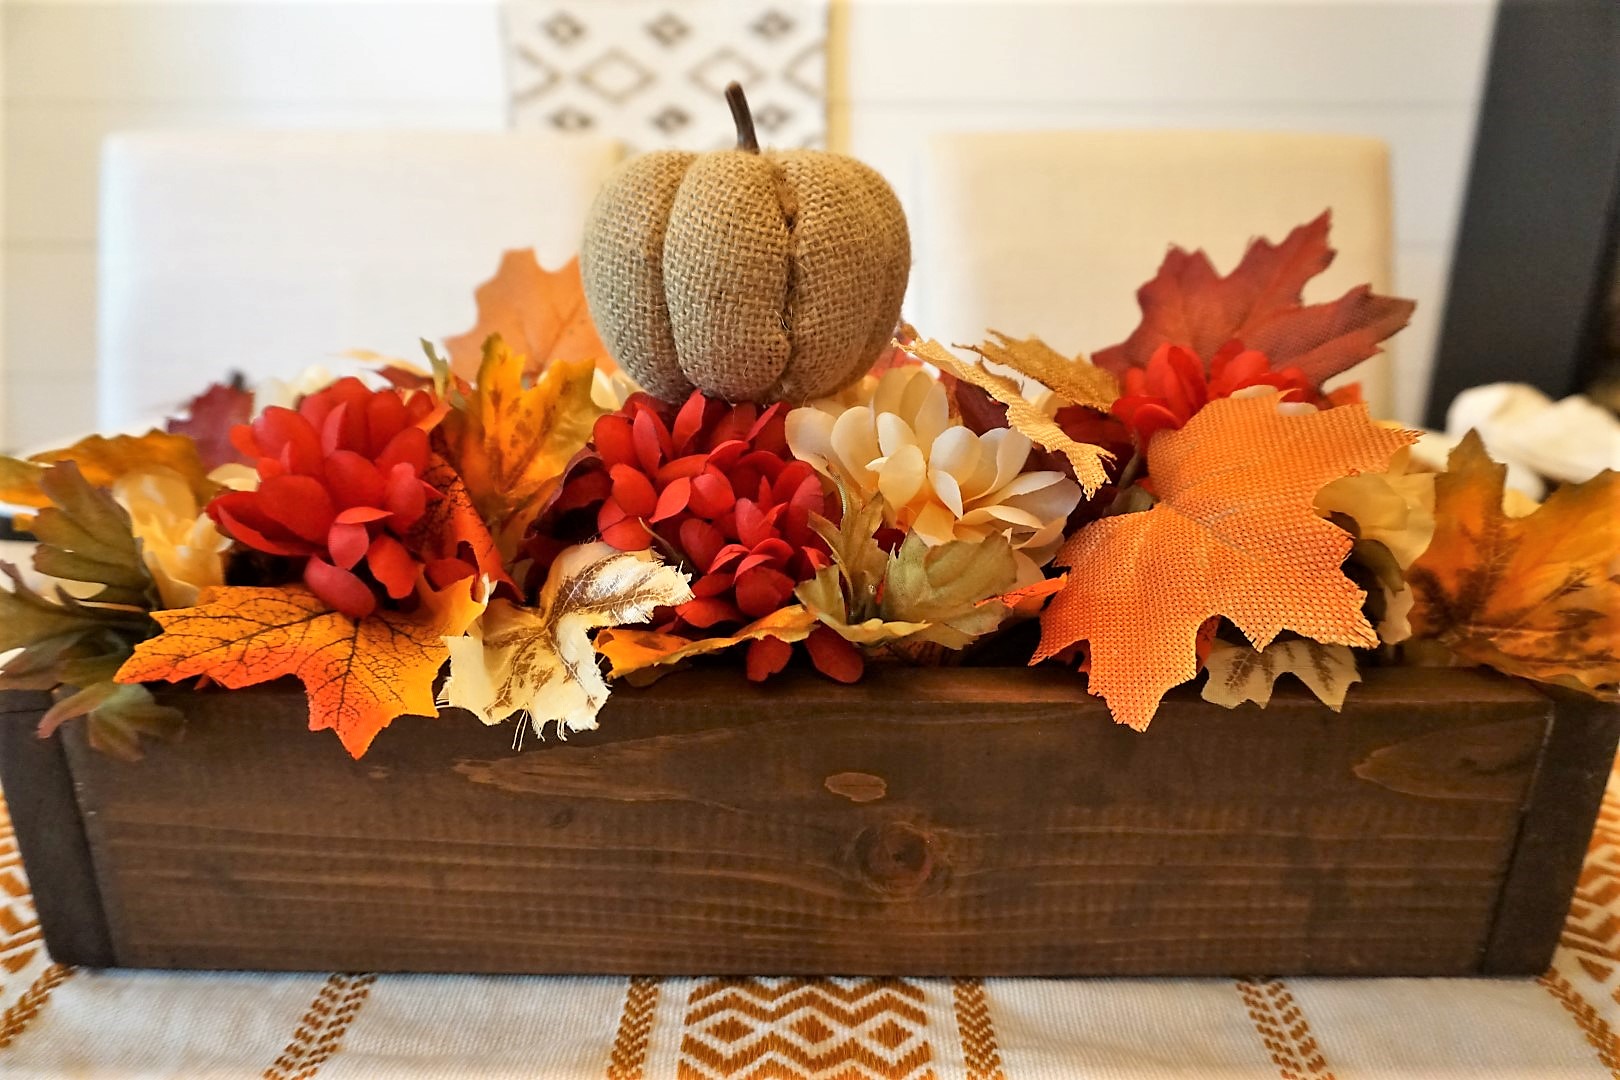
You might remember this Run for the Roses centerpiece I created earlier this year for the Kentucky Derby. My husband made this wonderful wooden box in shop class many years ago and with a little stain, it makes the perfect centerpiece base. To make your own, check out this tutorial from The Creative Mom or order a unfinished box ready for staining from Oriental Trading Company.
Once you have your box stained or painted to a color of your liking, you can use it over and over again for new creations!
What You Need
Wood Planter Box
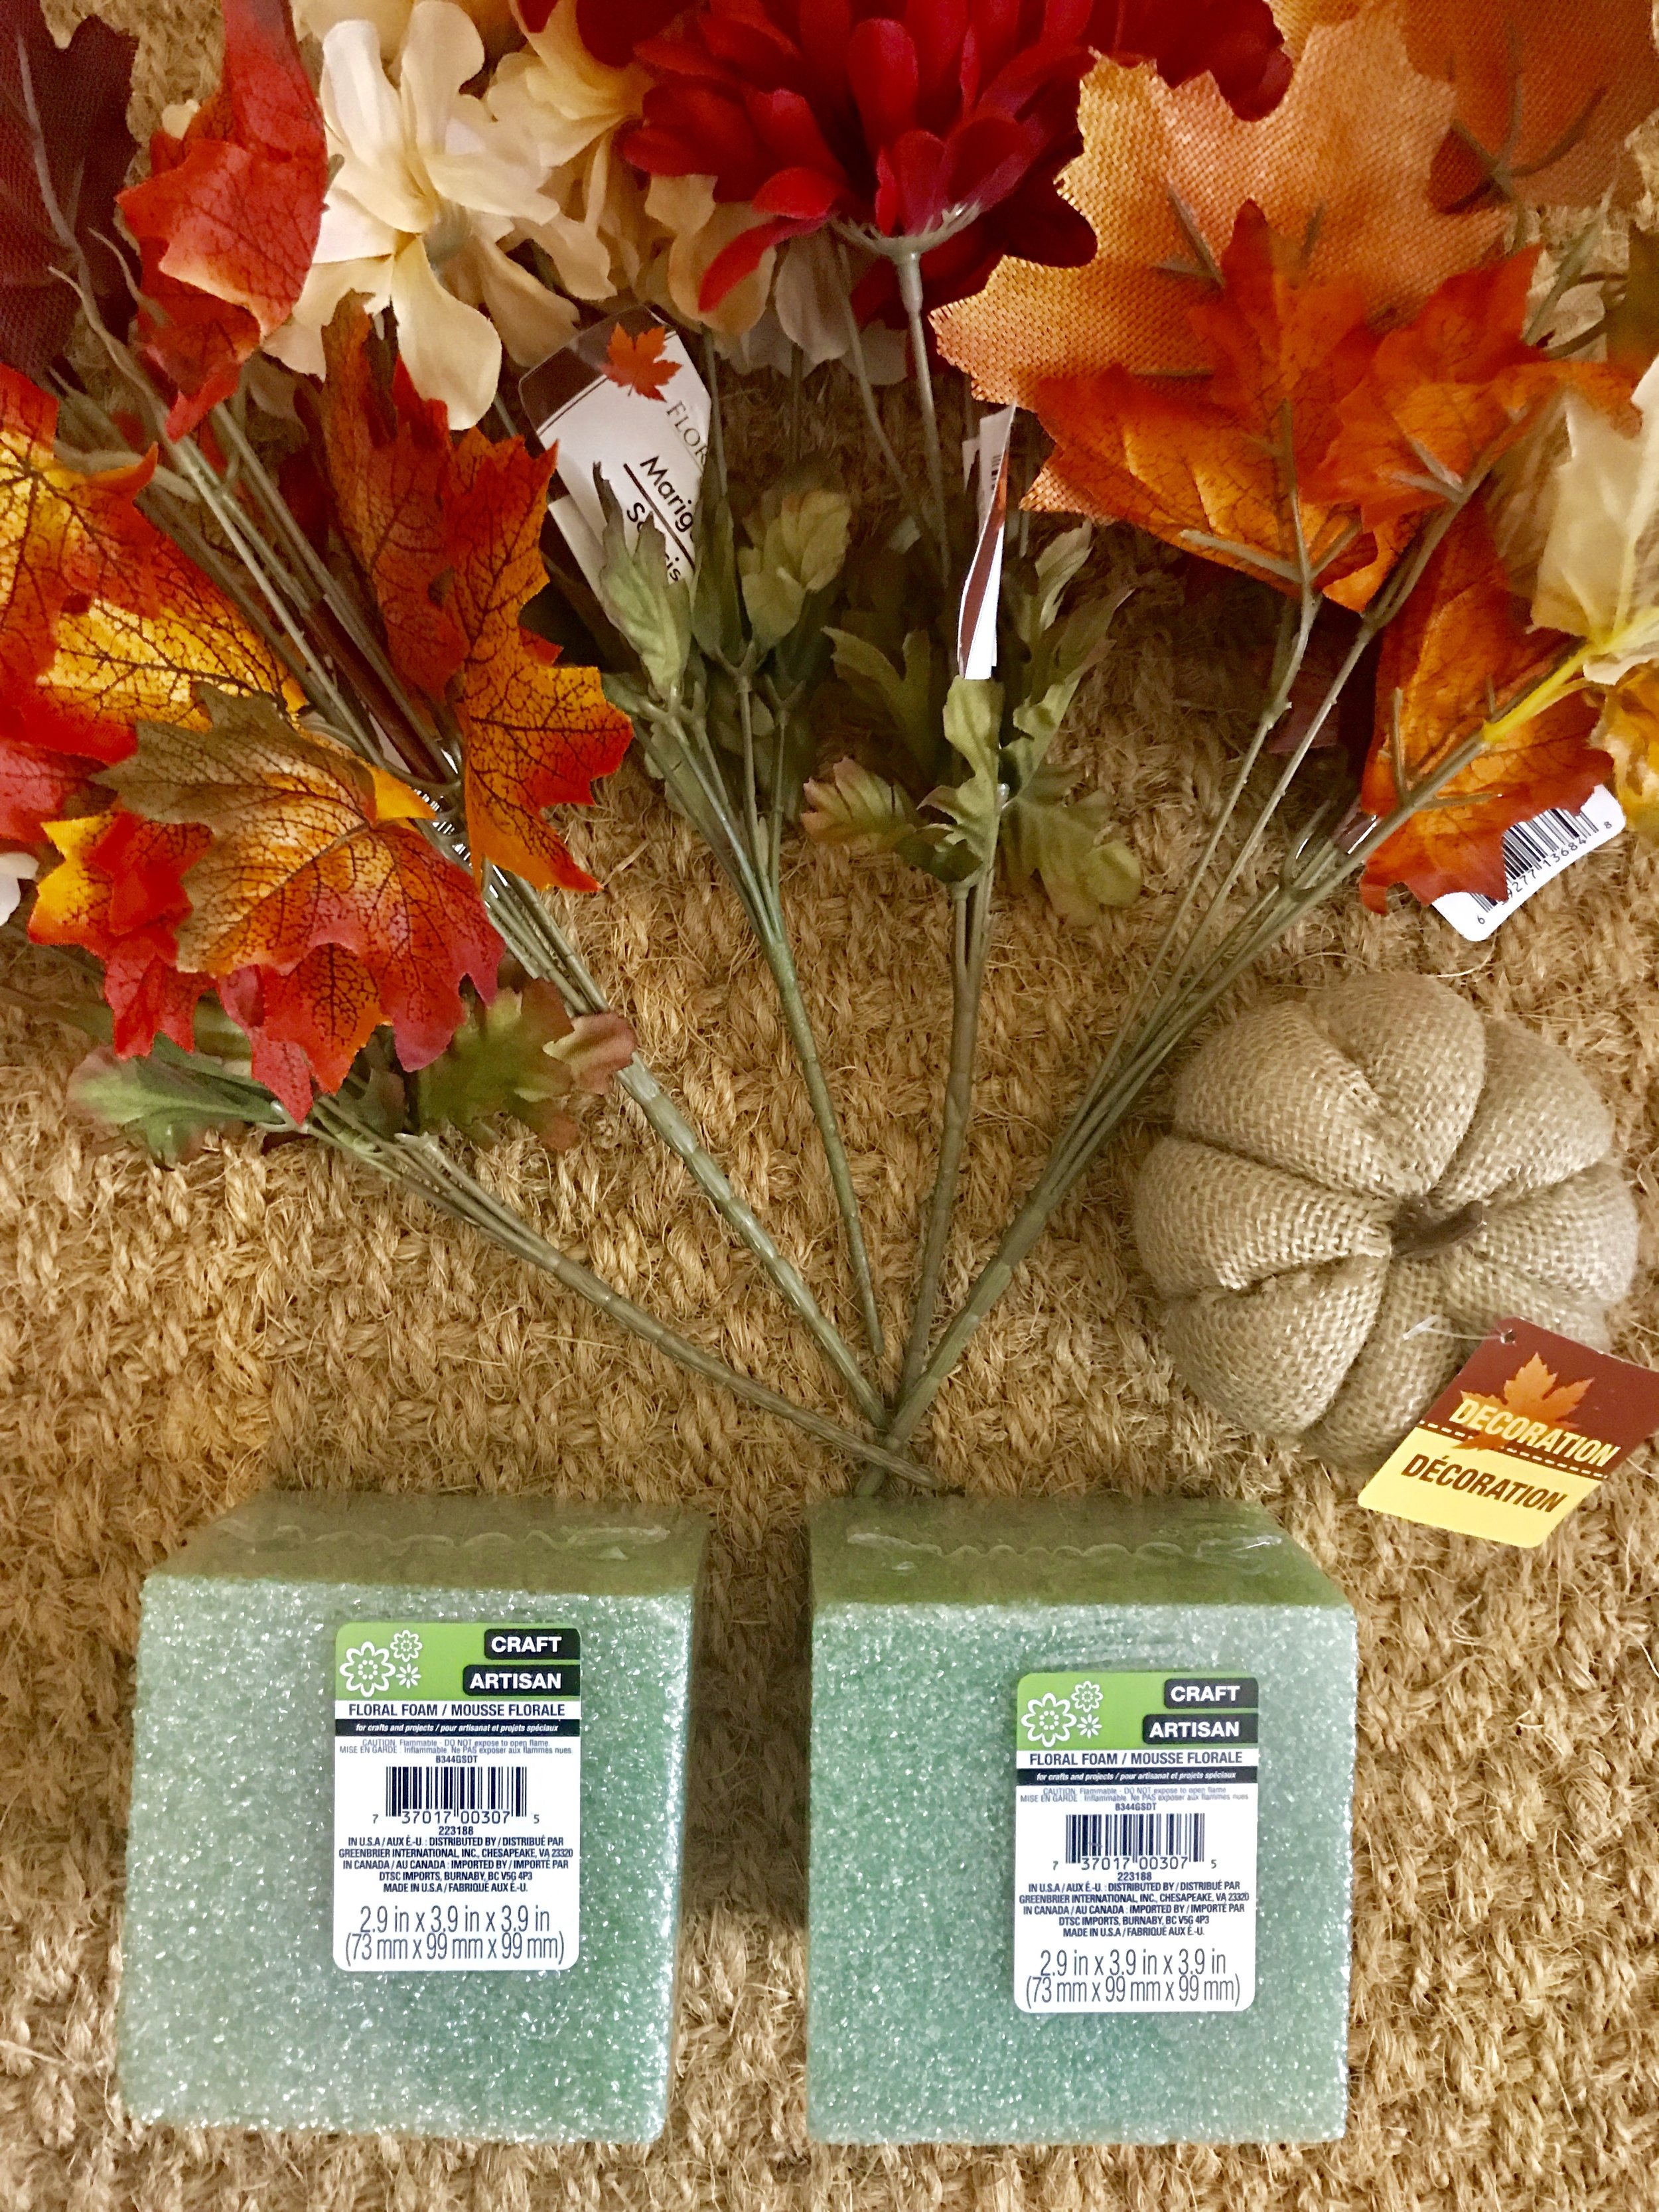
4-6 Stems of Fall Floral ($1 per stem at Dollar Tree)
2-3 Blocks of Floral Styrofoam ($1 per block at Dollar Tree)
Burlap Pumpkin (optional) ($1 at Dollar Tree)
Wire Cutter or Sharp Scissors
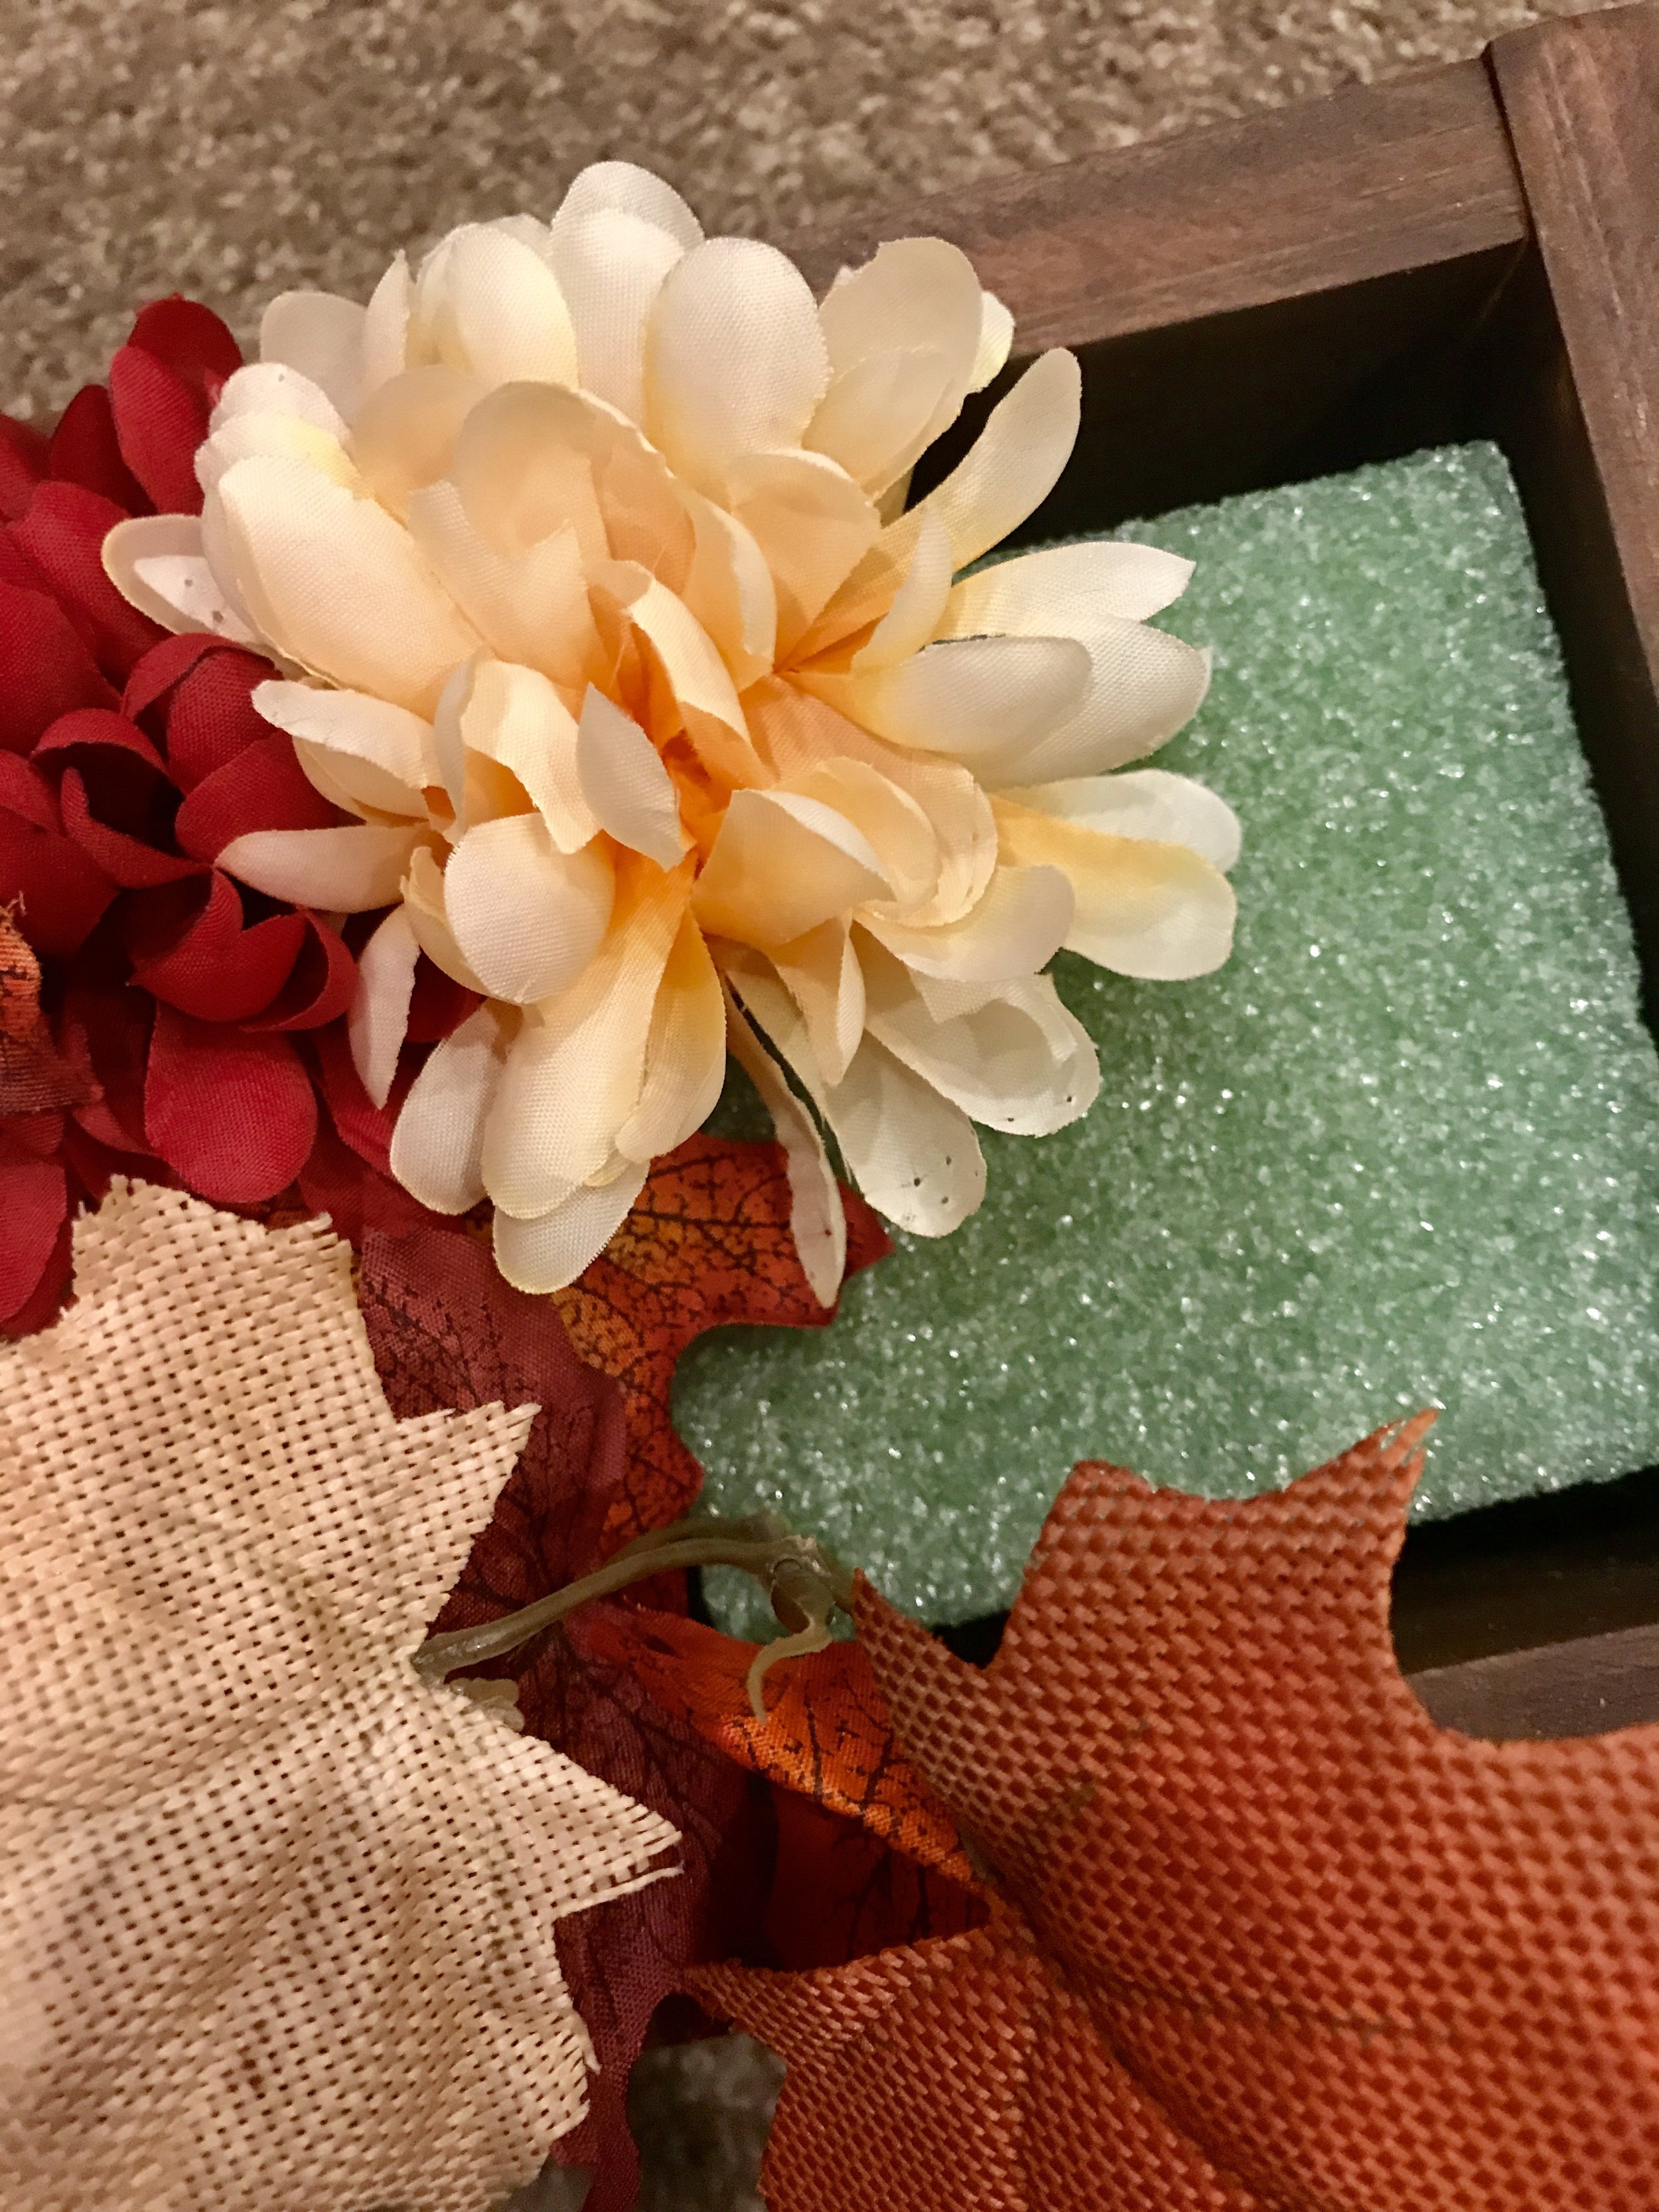
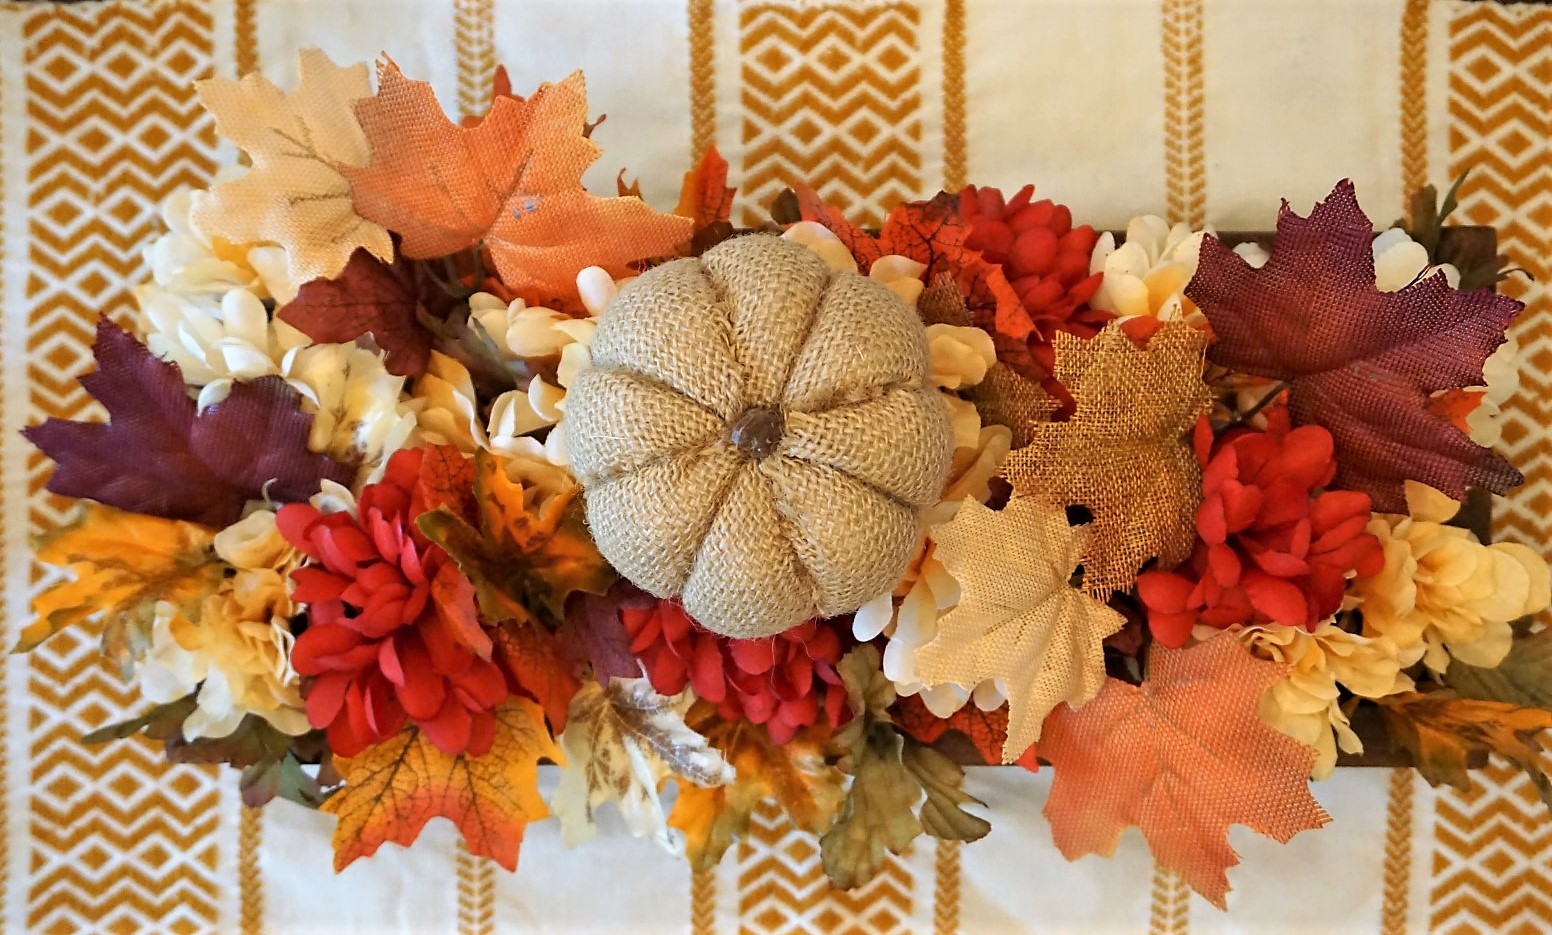
Place the floral foam into your container of choice. I used three squares to fit most of the length of the box. Any gap was filled in by additional floral. There are square and rectangular sizes of foam. Either will work. You may want to take your container or bring measurements to decide how many you'll need. At $1 a piece, these are generally a lot cheaper to buy at the dollar store than a craft store.
Once you have the foam place, it's time to start arranging. I used a mixture of 5 stems that I picked up at Dollar Tree. I picked out a selection of ivory and burgundy flowers (3 stems) and then chose coordinating stems of leaves (2 stems). I also picked up a styrofoam burlap pumpkin to add into the arrangement. They had several different types of pumpkins and gourds to choose from if you want a different look.
To get real with you, any kind of arrangement of floral -- real or fake -- used to terrify me. I thought I just wasn't good at that sort of thing. But, I decided to face my fear this year and just give it a try! There is no perfect step-by-step when creating an arrangement like this. I started by cutting the larger flowers with a wire cutter and arranging a mixture of the ivory and burgundy. Then, I started filling in the leaves and leftover greens. I repeated the process on each foam square keeping in the mind the overall arrangement as I went. It's okay to pull things out and rearrange. It's part of the fun of it!
When I had the flowers and leaves arranged how I wanted, I used a wooden skewer (like the ones for kabobs) to secure it into the foam. The wire cutter came in handy to trim down the skewer to the desired height.

In about 30 minutes, I had a new fall centerpiece!
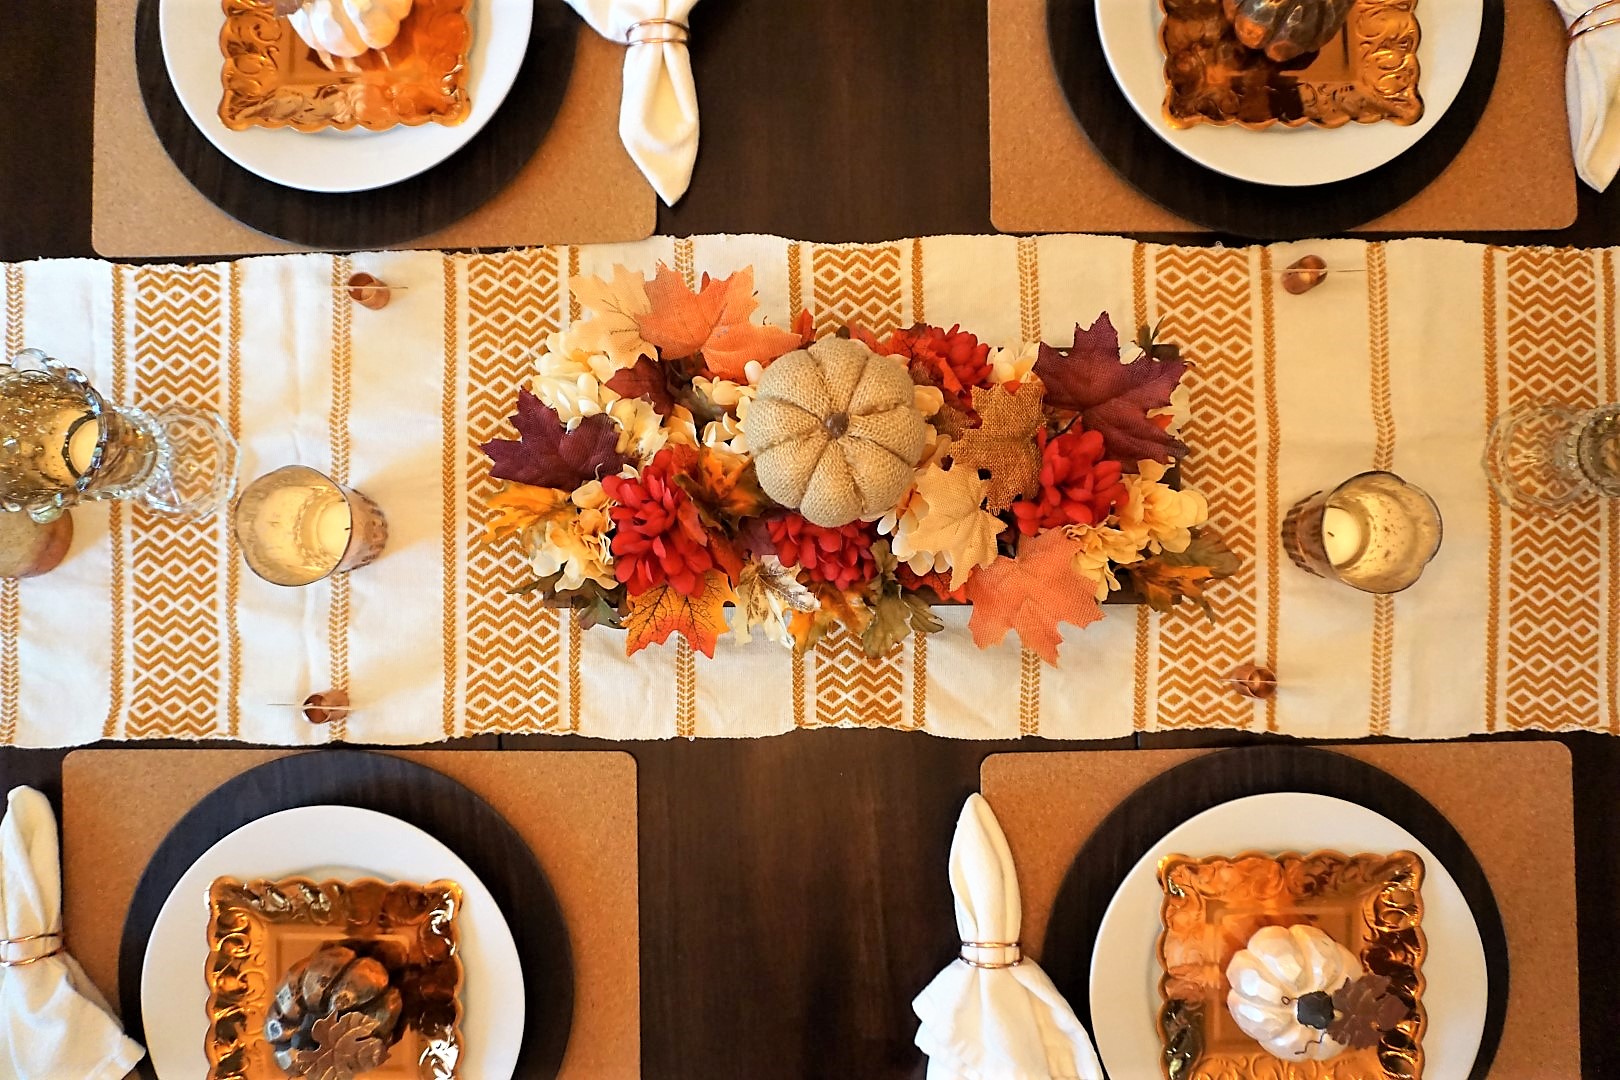
Now for some table tips! I started with an ivory and mustard table runner that we got at a local shop in Belize on our honeymoon last year. I love when you find linens or decor on a trip. It's a fun way to remember the trip in your everyday life.
The DIY centerpiece went front and center and then I added a mixture of copper tealights leftover from our wedding last year. Mix and match tealights are a great way to add some warm lighting to your dinner table. Thrift stores are a great place to look for these on a budget. I've also seen great deals at dollar stores, craft stores, and Target and Walmart.
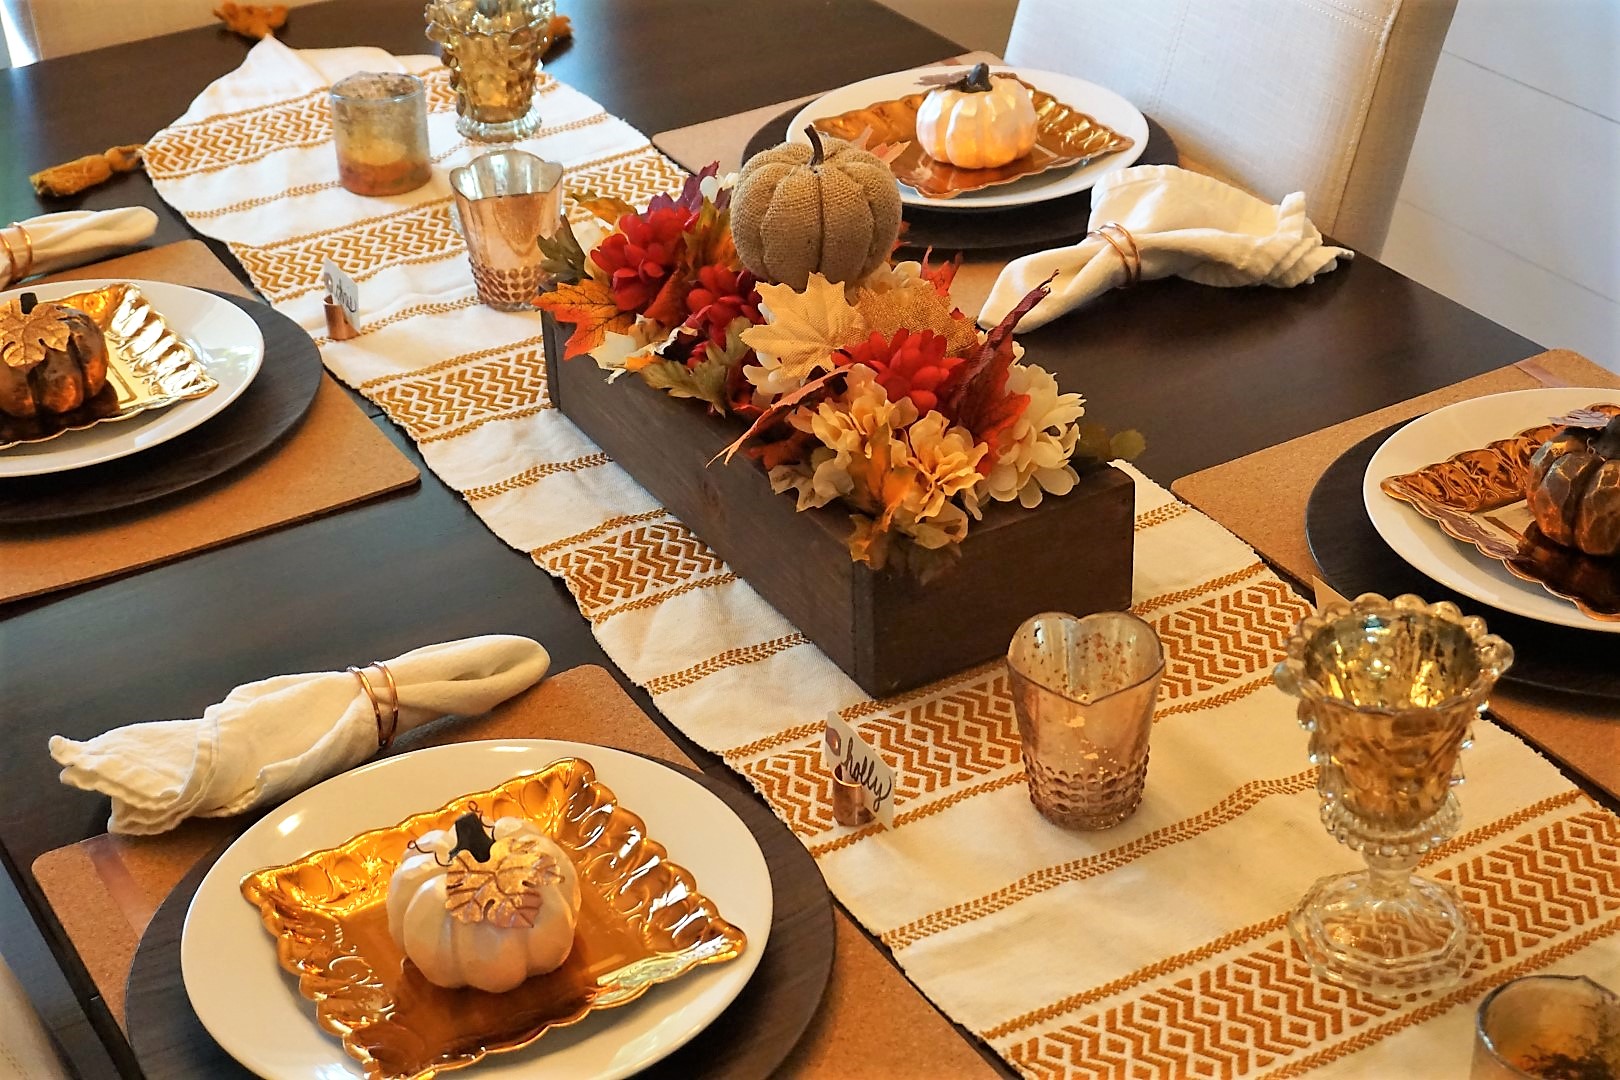
I started each place setting with Ikea cork placemats ($4.99/4 pack). To jazz them up, I added copper washi tape from Oriental Trading Company. All you need is a strip for each or you can get creative with your own design. You might remember the tape from our DIY wedding signage. I've used it for several projects now.
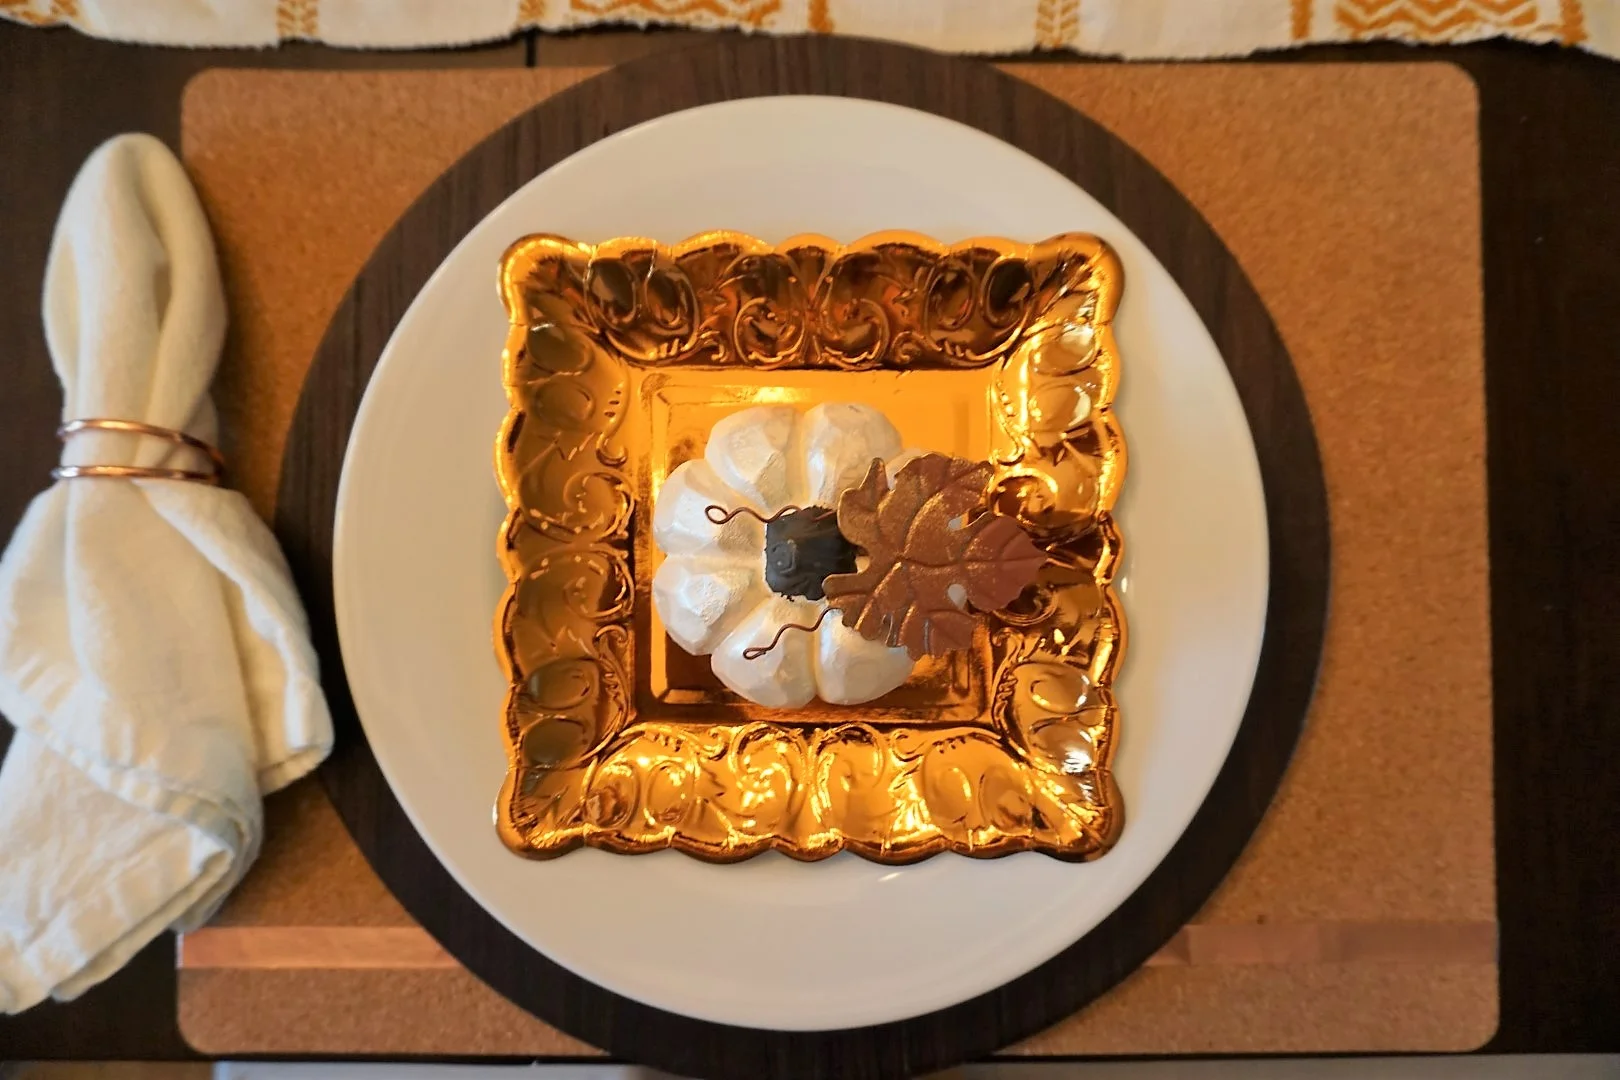
I layered on a faux wood charger from Walmart. Although they are no longer available online, I've seen them in stores and recently snagged a set at $1.50 each. I used our everyday white plates from Crate and Barrel and added on a paper copper appetizer plate from Hobby Lobby. The plates were recently 40% off in stores. To top off the place setting, I added on some pumpkins I picked up at Dollar Tree. They are heavy!! I am excited to use them throughout fall and Thanksgiving time.

Fancying up the table doesn't just have to come for the holidays! We had my brother-in-law and sister-in-law over for dinner last night for a mix of catching up after vacations and celebrating a few occasions, so it was fun to have a festive dinner table. I used the DIY copper pipe place card holders from our wedding and shipping tags for place cards.


It was a great way to end the weekend!